Qualitative and Mixed Methods Data Analysis with Dedoose
24 Qualitative Data Analysis with Dedoose: Data Management
Mikaila Mariel Lemonik Arthur
While researchers generally refer to the software they use to facilitate qualitative research as qualitative data analysis software, such software programs also play a very important role in data management and data reduction. Indeed, without employing the data management capabilities of qualitative data analysis software, the software itself is unlikely to be functional. Thus, before we start analyzing our data using tools like Dedoose, we need to feed the data we have collected into the tool of our choice and take various steps to set it up to be usable. This chapter will provide an overview of how to get started with a project in Dedoose and add data to the project, as well as how to view and manipulate the data. This chapter assumes you have already created a user account with Dedoose and downloaded and installed the software, and that you can successfully log into your account in the program. Note that if you run into technical difficulties while using Dedoose, their support can be reached at support@dedoose.com.
Getting Started With a New Project
The first step in getting started with Dedoose is to either create a new project or be added to an existing one. This chapter will assume you are starting with a new project; if you are working with an existing project, someone who has administrative privileges on the existing project will need to add you to it. “Projects,” in Dedoose’s terminology, are workspaces that store complete collections of data from a particular research study.
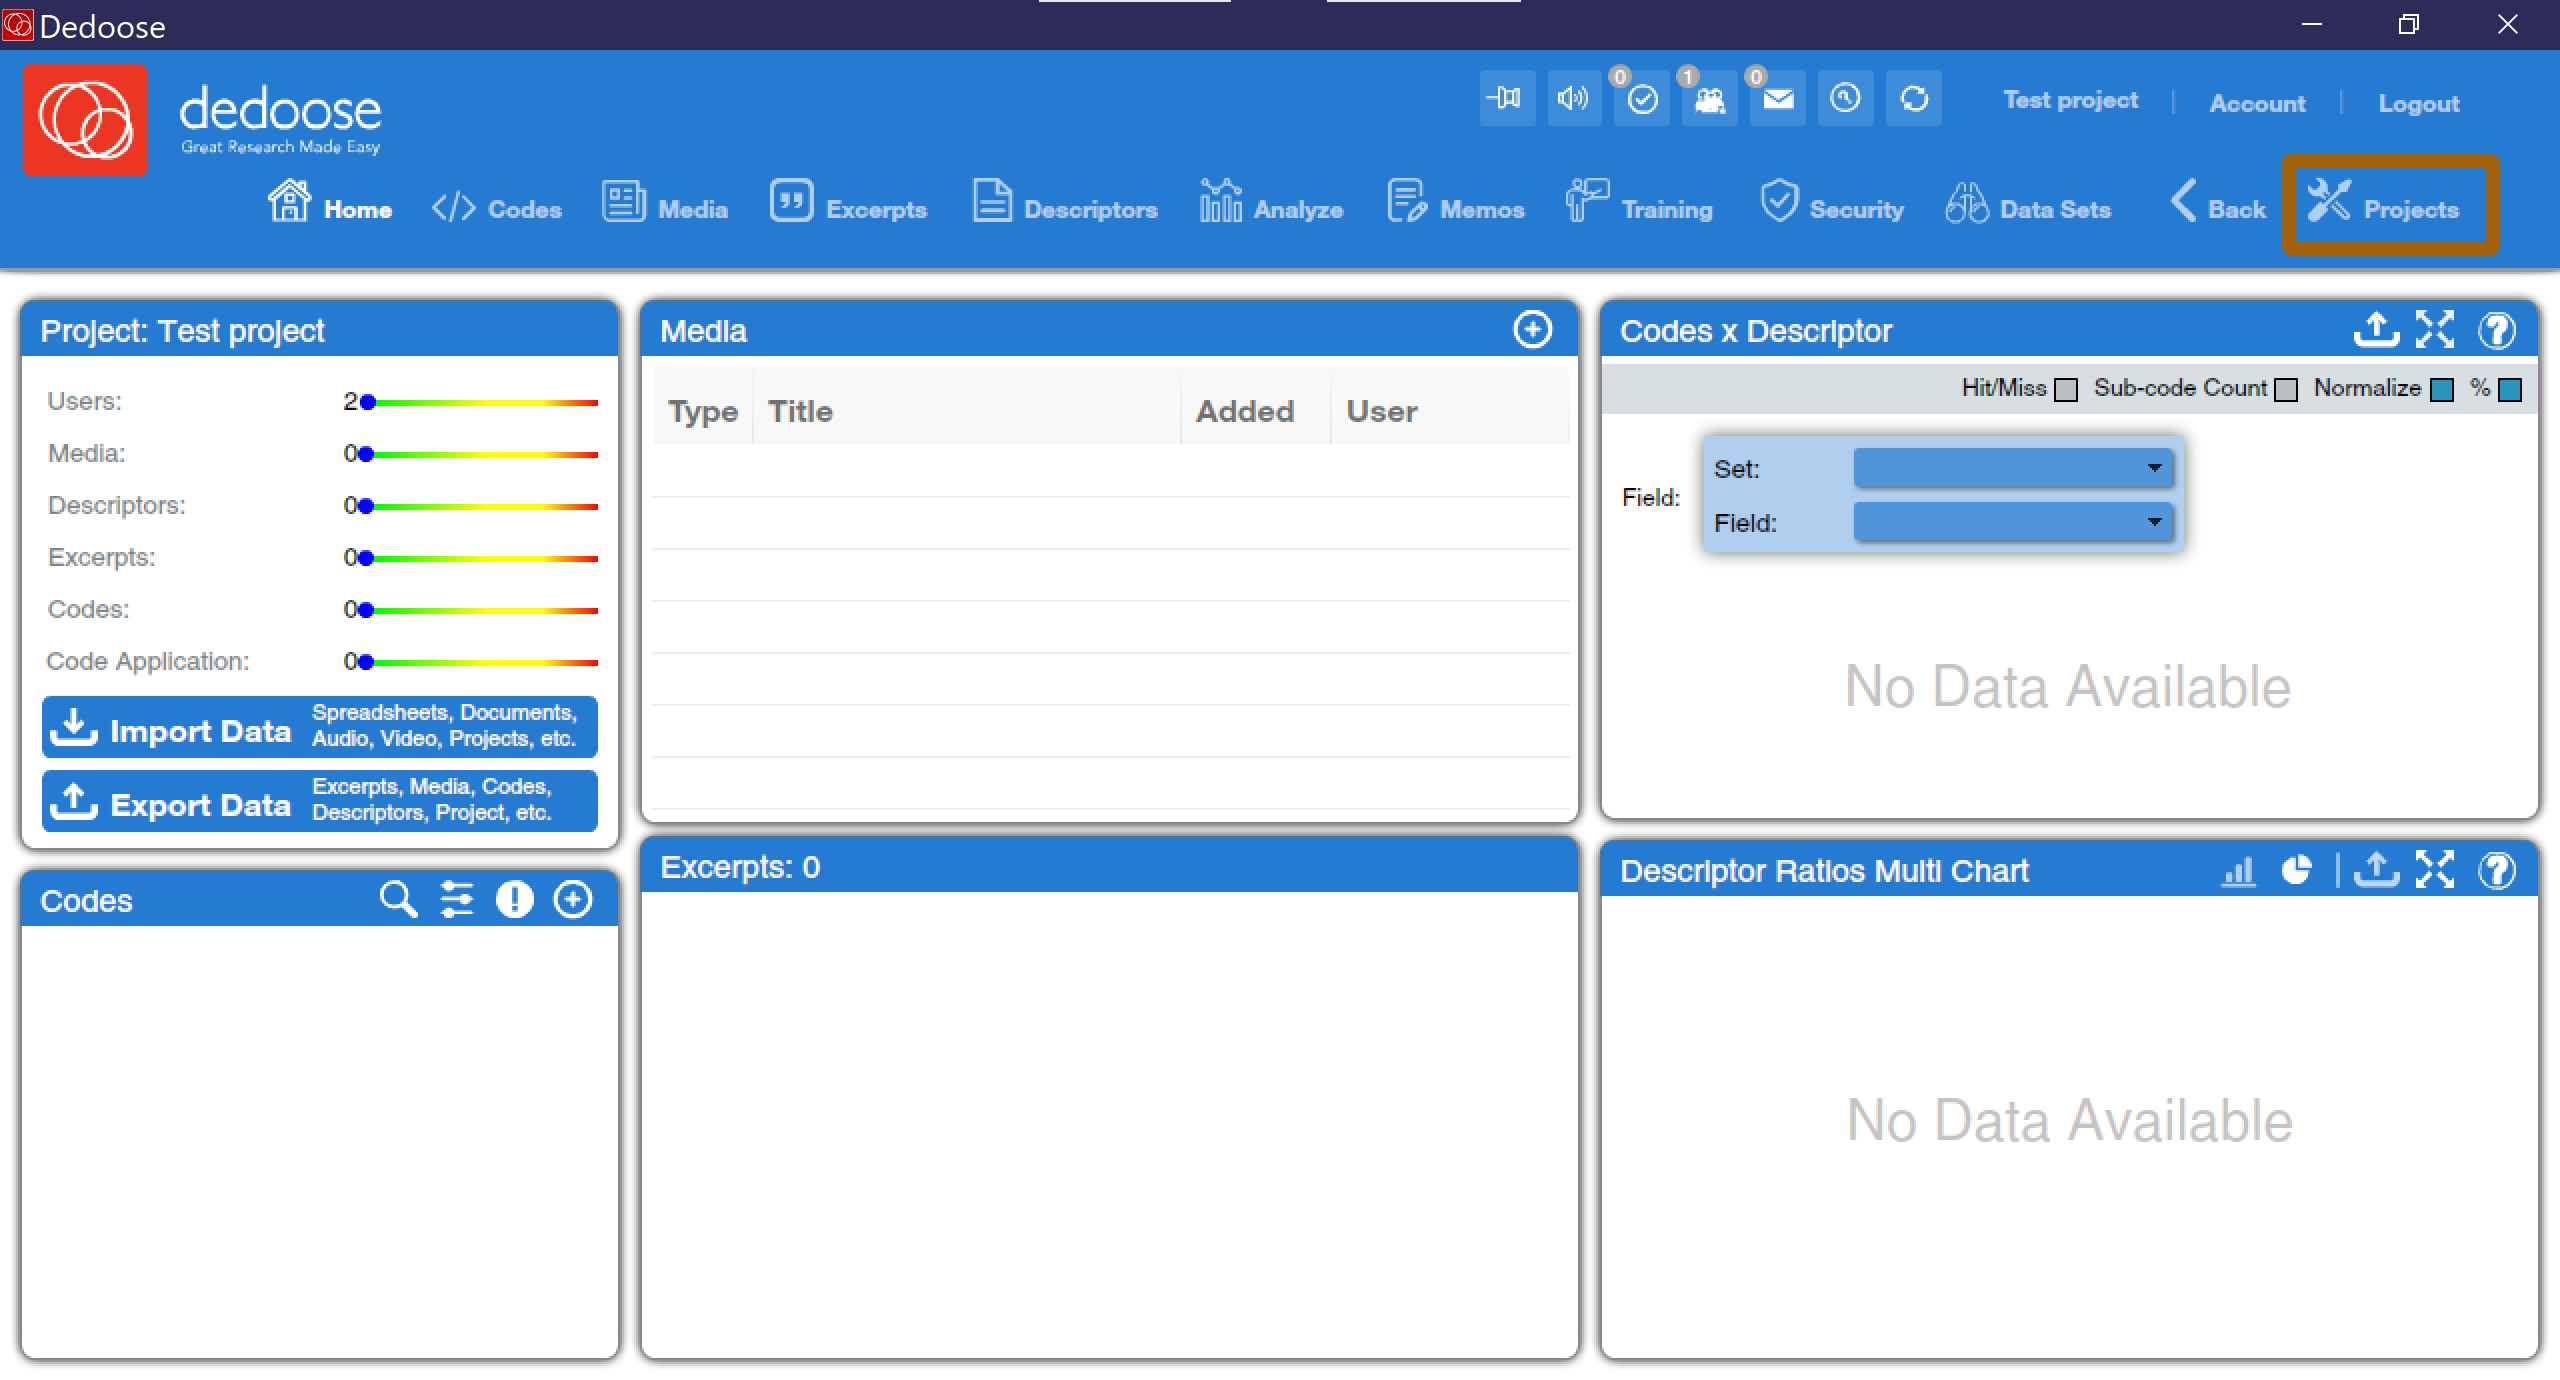
To create a new project, first click on “projects” on the menu bar in the top right corner of the screen, as shown in Figure 1.
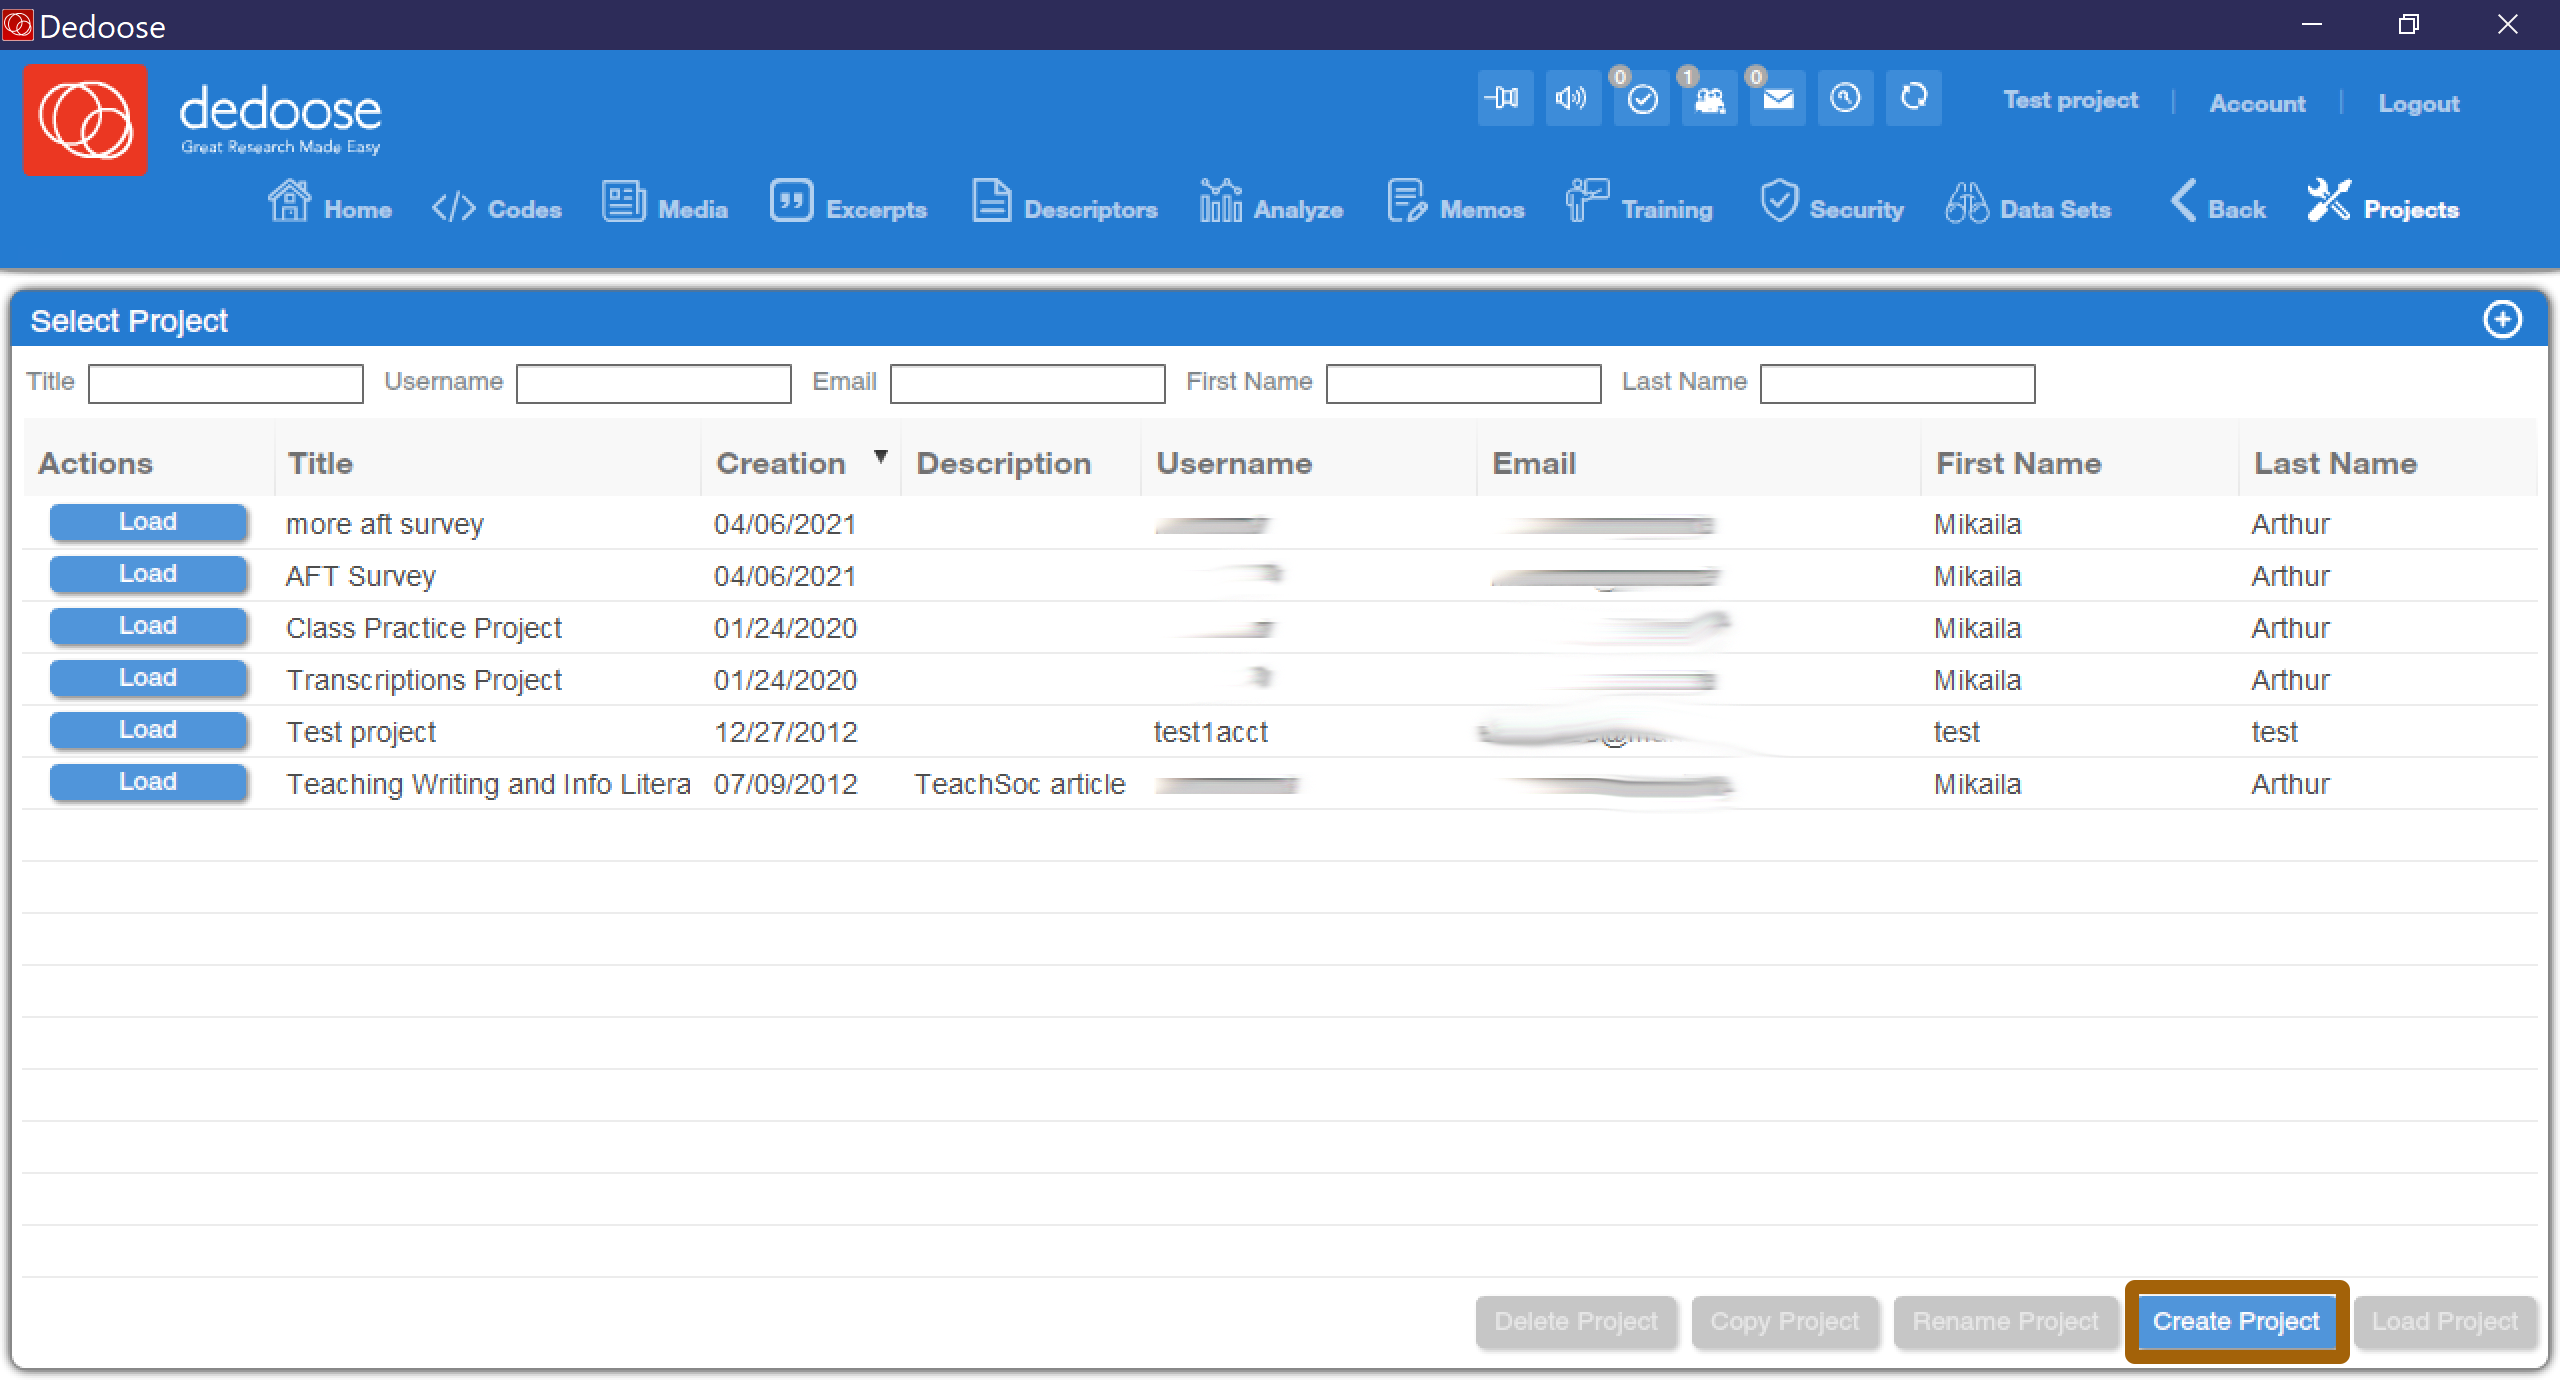
This will bring up a window that lists all of the projects your account has access to. If you are a new Dedoose user, you will likely have far fewer projects in your account than the examples here will show; as you develop additional projects, they will be added to your list. Next, click on the “Create Project” button at the bottom of the screen.
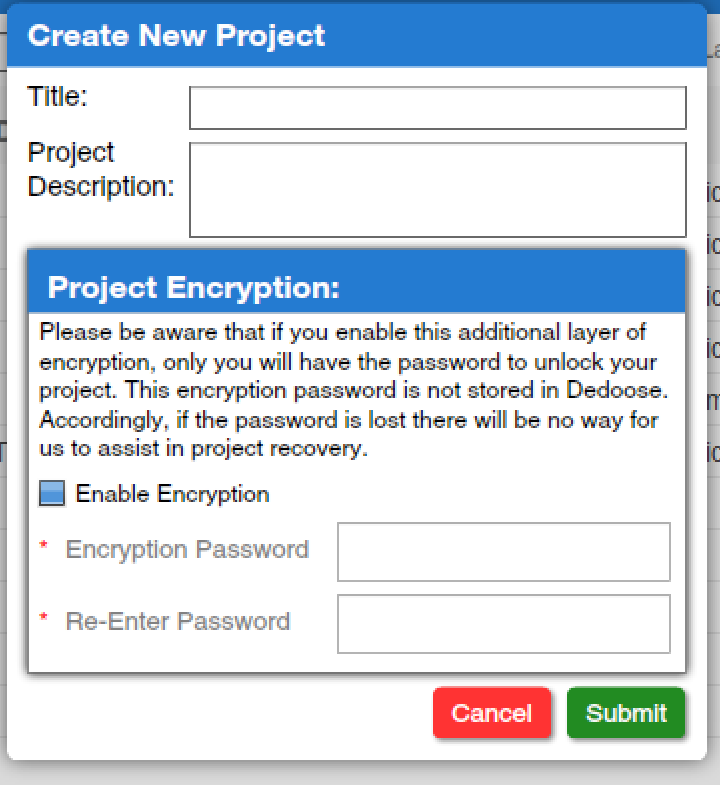
The final step in creating a project is to set up that project, using the “create project” popup window shown in Figure 3, by giving it a title (this should be short but descriptive, so you can remember which project is which) and a brief description of the project. If you wish, you can assign the project an encrypted password, but note that this makes it impossible for Dedoose to help you recover the project. Once you have set up the project, click submit.
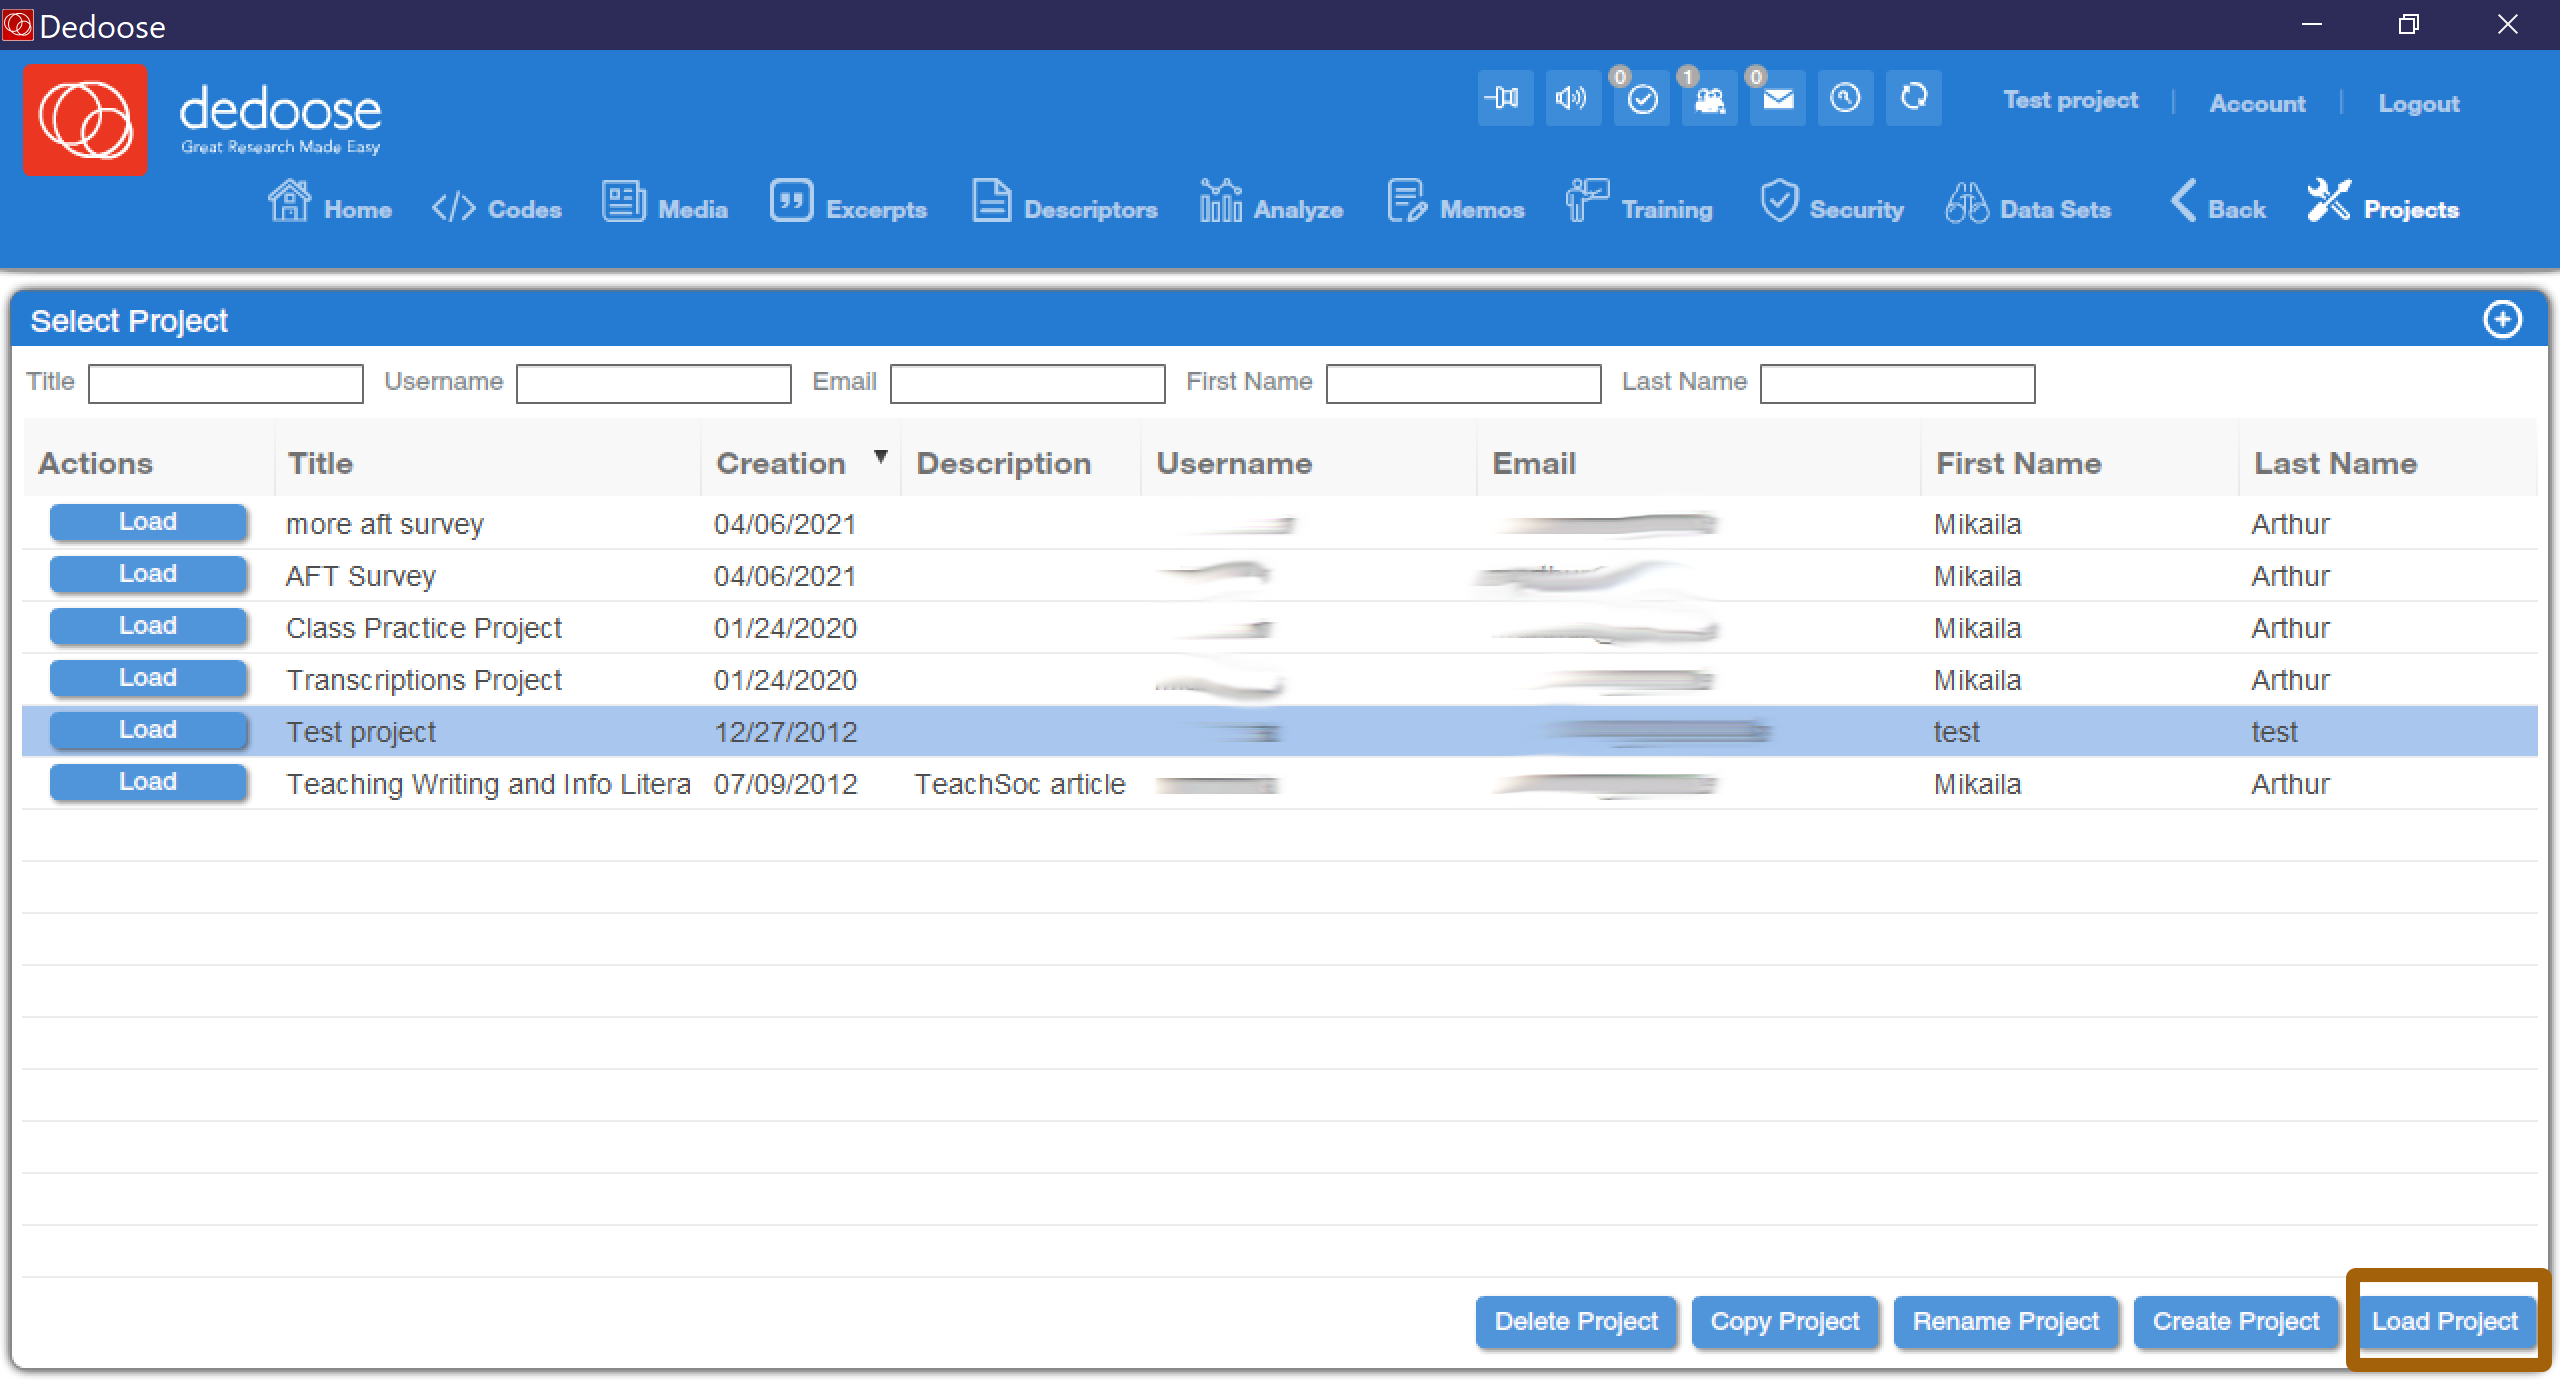
Once you have created your project, you may need to load it by first selecting it from the list of projects in the project window, then clicking the “load” button next to the project name, as shown in Figure 4. You will see that the information you provided in setting up your project now appears in the list of projects. The project screen also provides buttons for deleting, renaming, and copying projects.
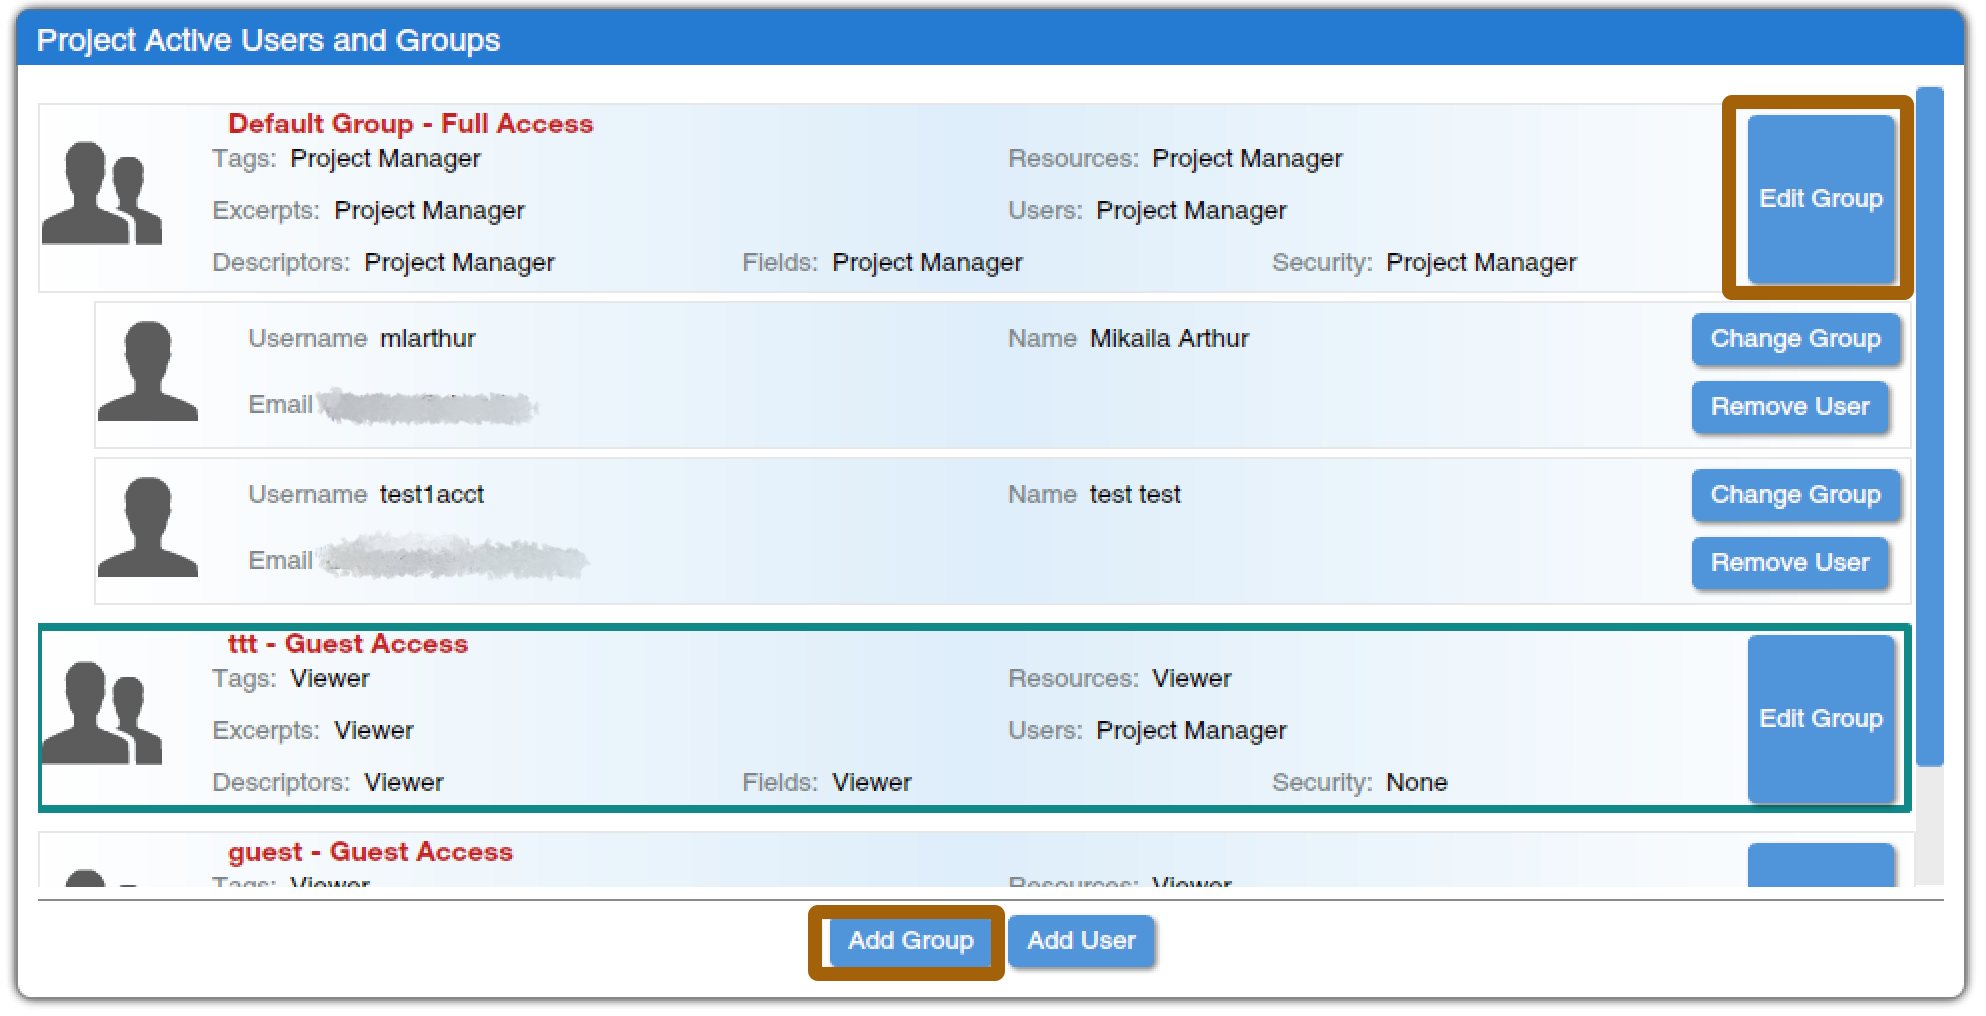
If you would like to add another user to your project, like your professor, a classmate, or a research collaborator, click on “security” in the top menu. Of course, if you are planning on working alone, you do not need to add anyone. The security center, shown in Figure 6, is not always the most intuitive feature of Dedoose, but luckily you do not need to use it too often.
The first step in the Security Center is to use the Add Group button to add a new group, or the Edit Group button to edit an existing group. A “group,” in this context, refers to a set of users who have similar security privileges—for instance, you might have a project director with full privileges to do anything with the project, two lead researchers who can use most tools in the project but cannot add other users, five research assistants who can code and use analysis tools but cannot delete anything, and an intern who can view the project but not edit it. Each of these types of people—project director, lead researcher, research assistant, and intern—would be a group, and the security center enables you to set specific security privileges for them.
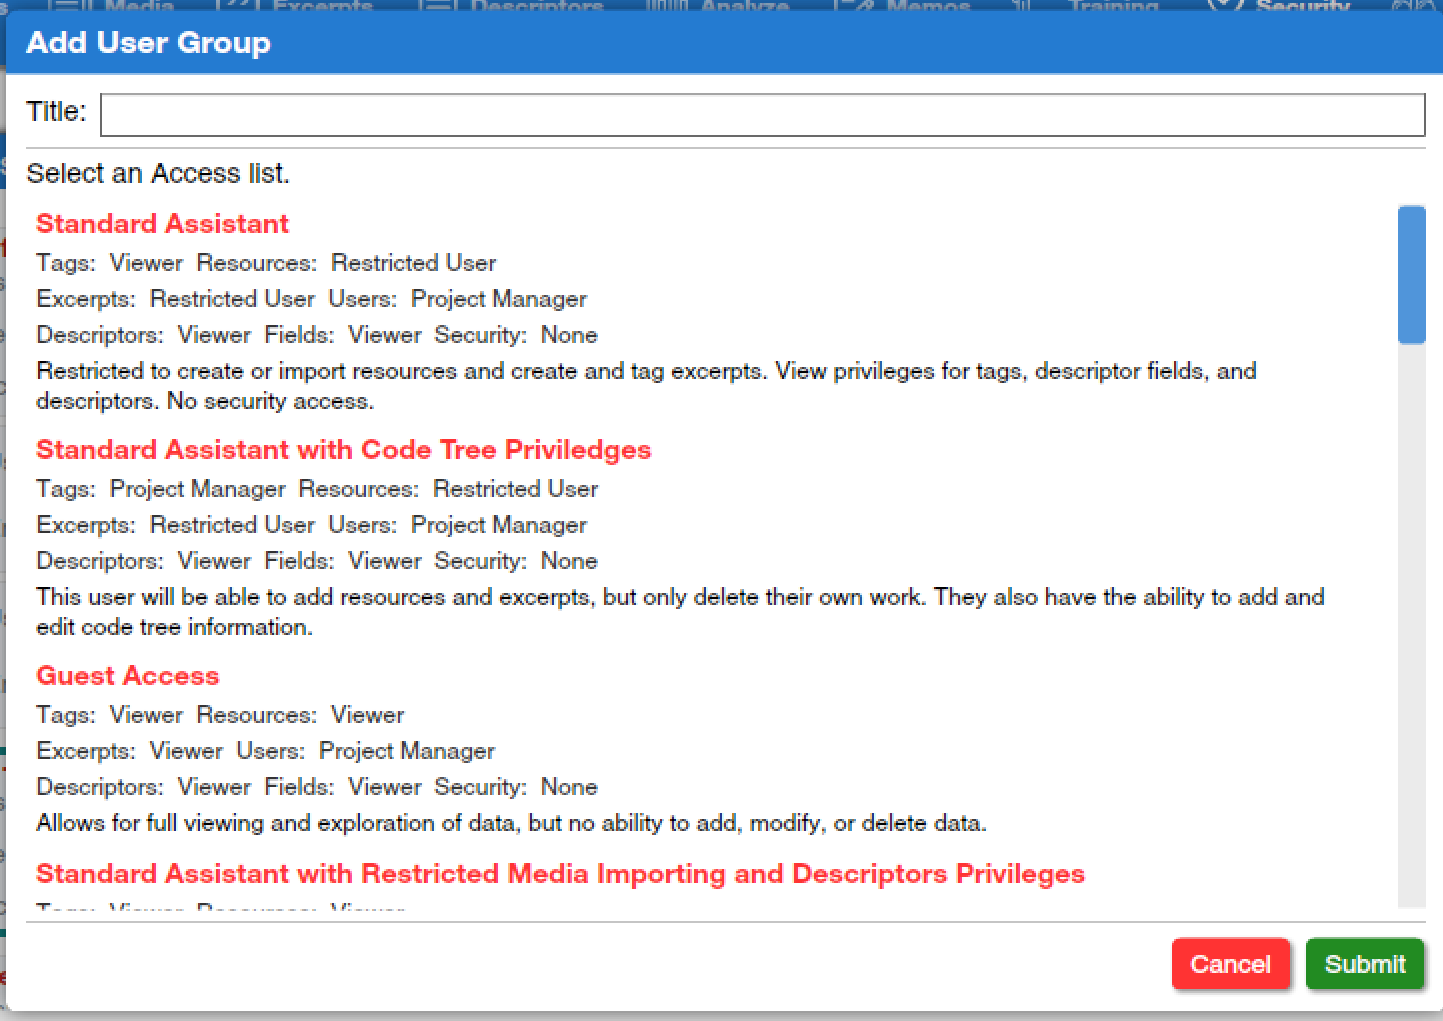
When you click on Add Group or Edit Group, a popup window opens, as shown in Figure 7, with a list of the various types of security privileges that are available. These vary in terms of the extent to which users in those groups can use various features, ranging from “Full Access” for our project manager to “Guest Access” for our intern. It may take a little while to explore the options and select the right one for your project. When you have done so, select that option and click the green submit button.
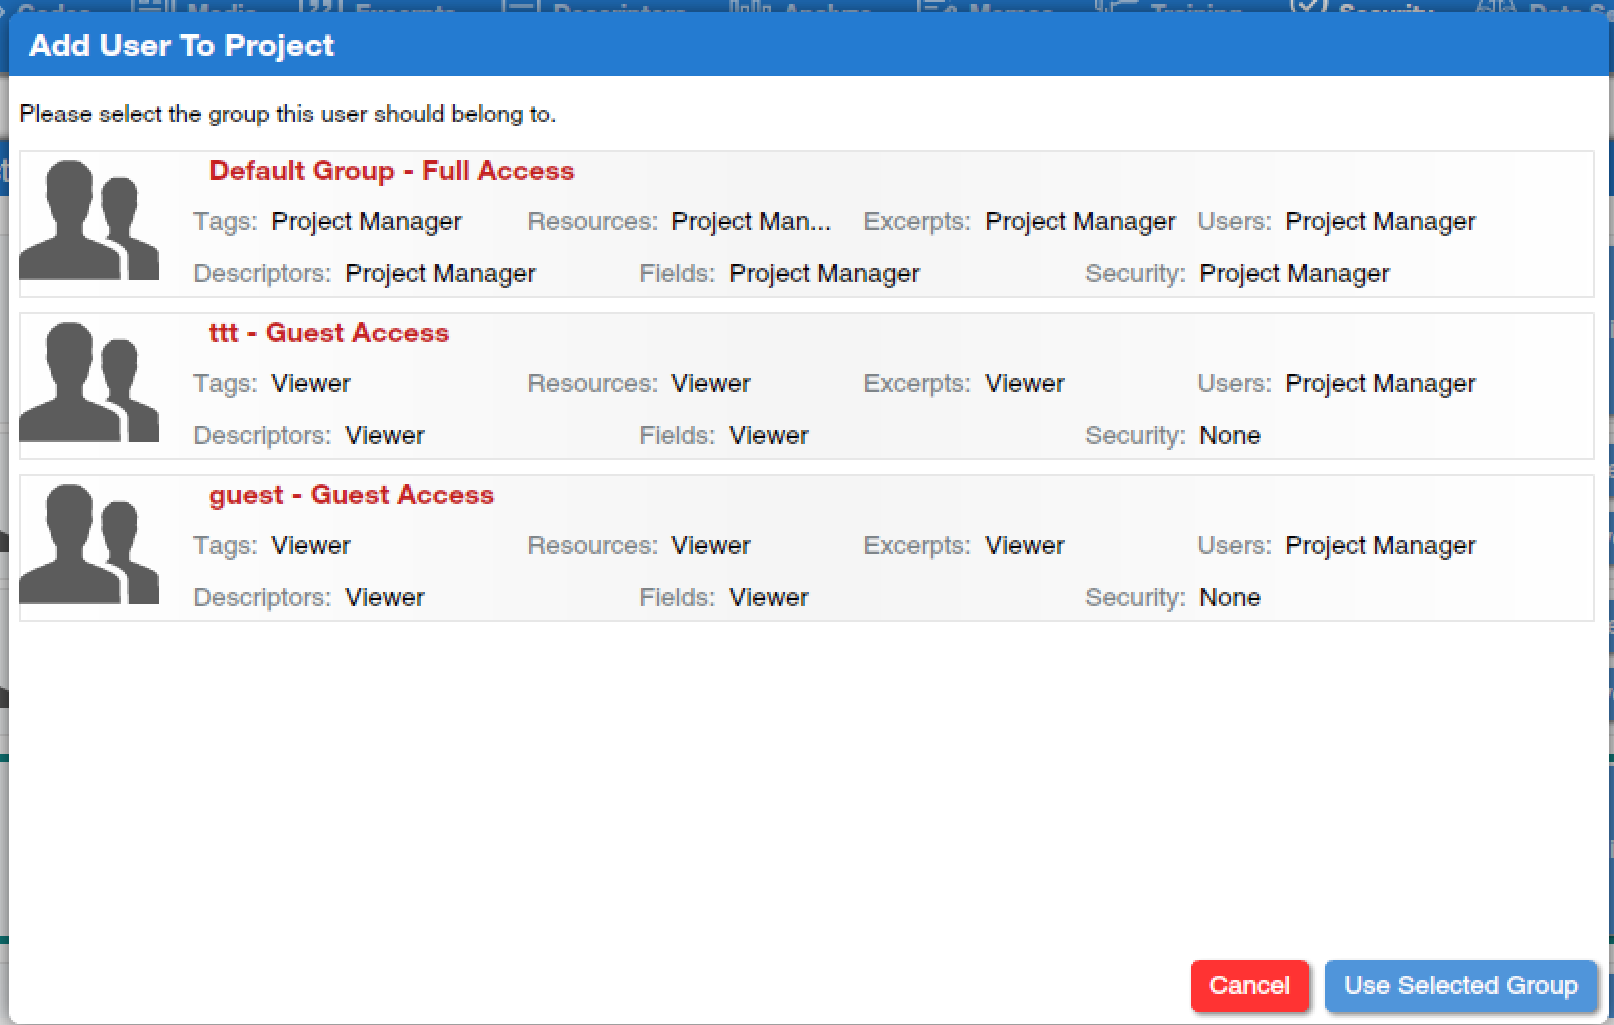
To add users to the user group you have now defined, use the “add user” button (next to the “add group” button highlighted in Figure 6. First, you will need to indicate which of the security groups you have defined this user should be added to. The system will then ask you for the user’s email address, and depending on whether the user is already an active Dedoose user or not will ask you whether you want to invite them to Dedoose, add them to your account, or just add them to the project.
Once you have finished working with the security center—or, if this is an individual project and thus you did not need to use the security center—your project should be ready for you to start working.
Working With Data
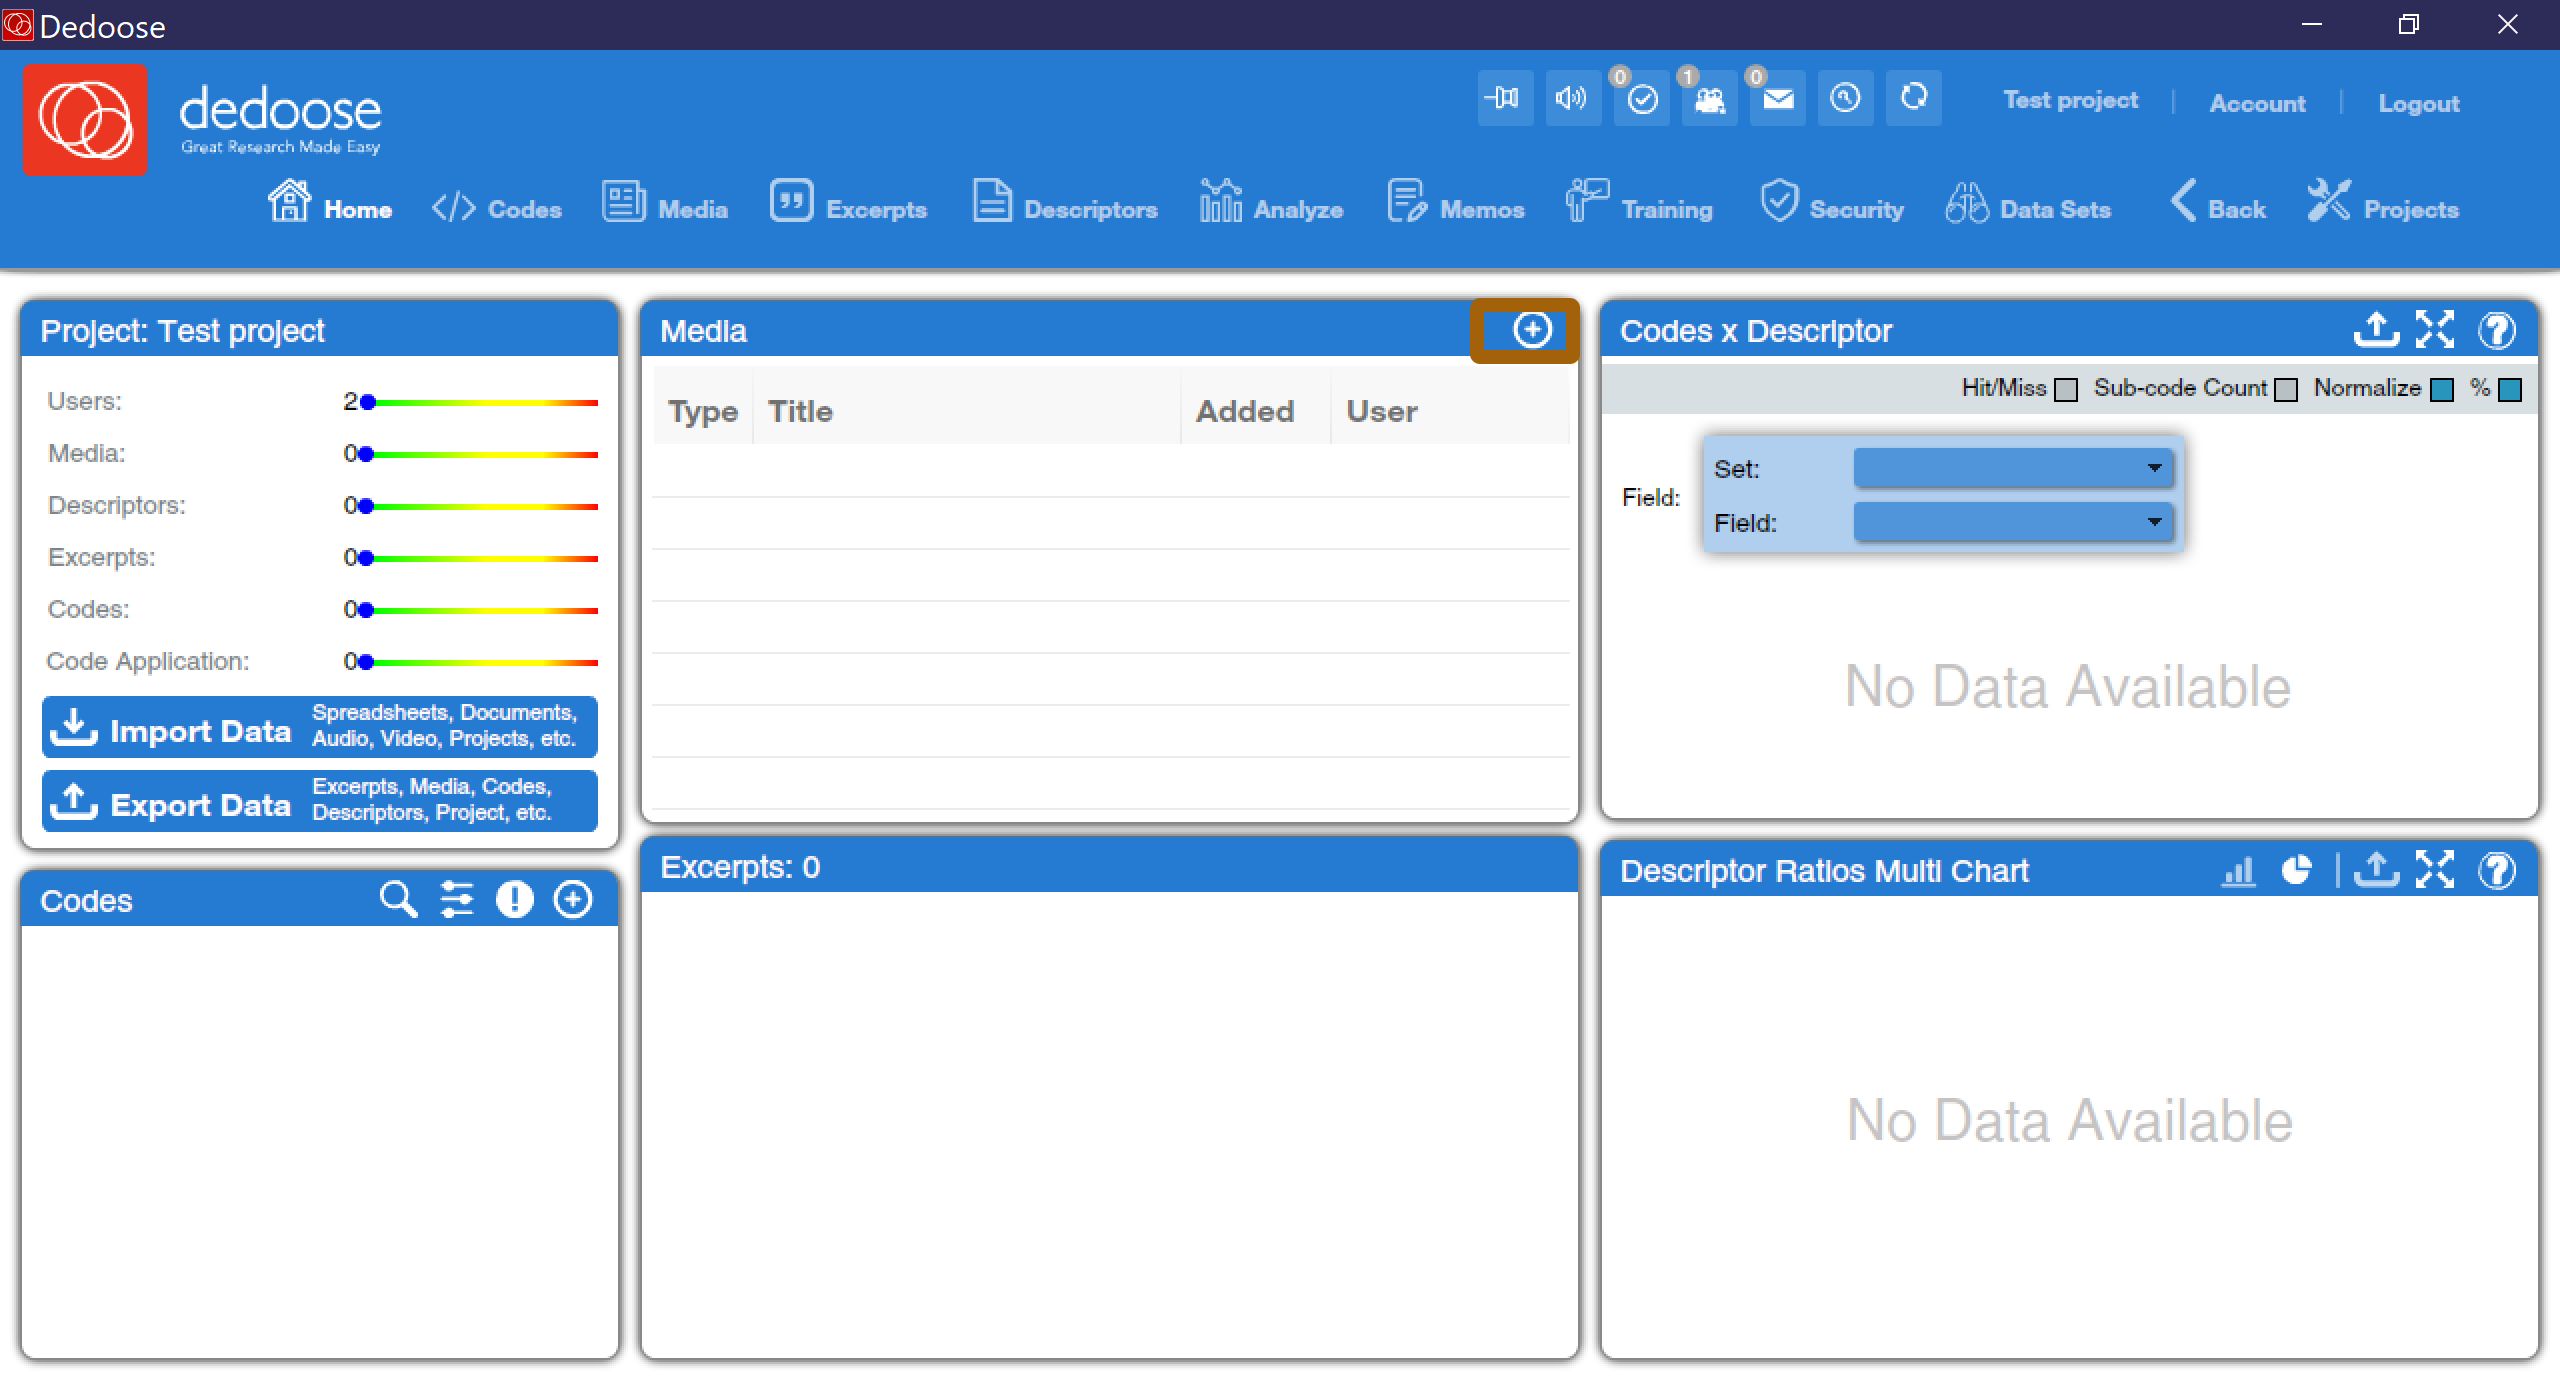
The first step in the qualitative data analysis project, as discussed in the chapter on Preparing & Managing Qualitative Data, is to prepare your data for analysis. In Dedoose, a key part of this process is adding your data to the application. To do this, click on the plus sign in a circle at the top of the “Media” box on the home screen, as shown in Figure 9.
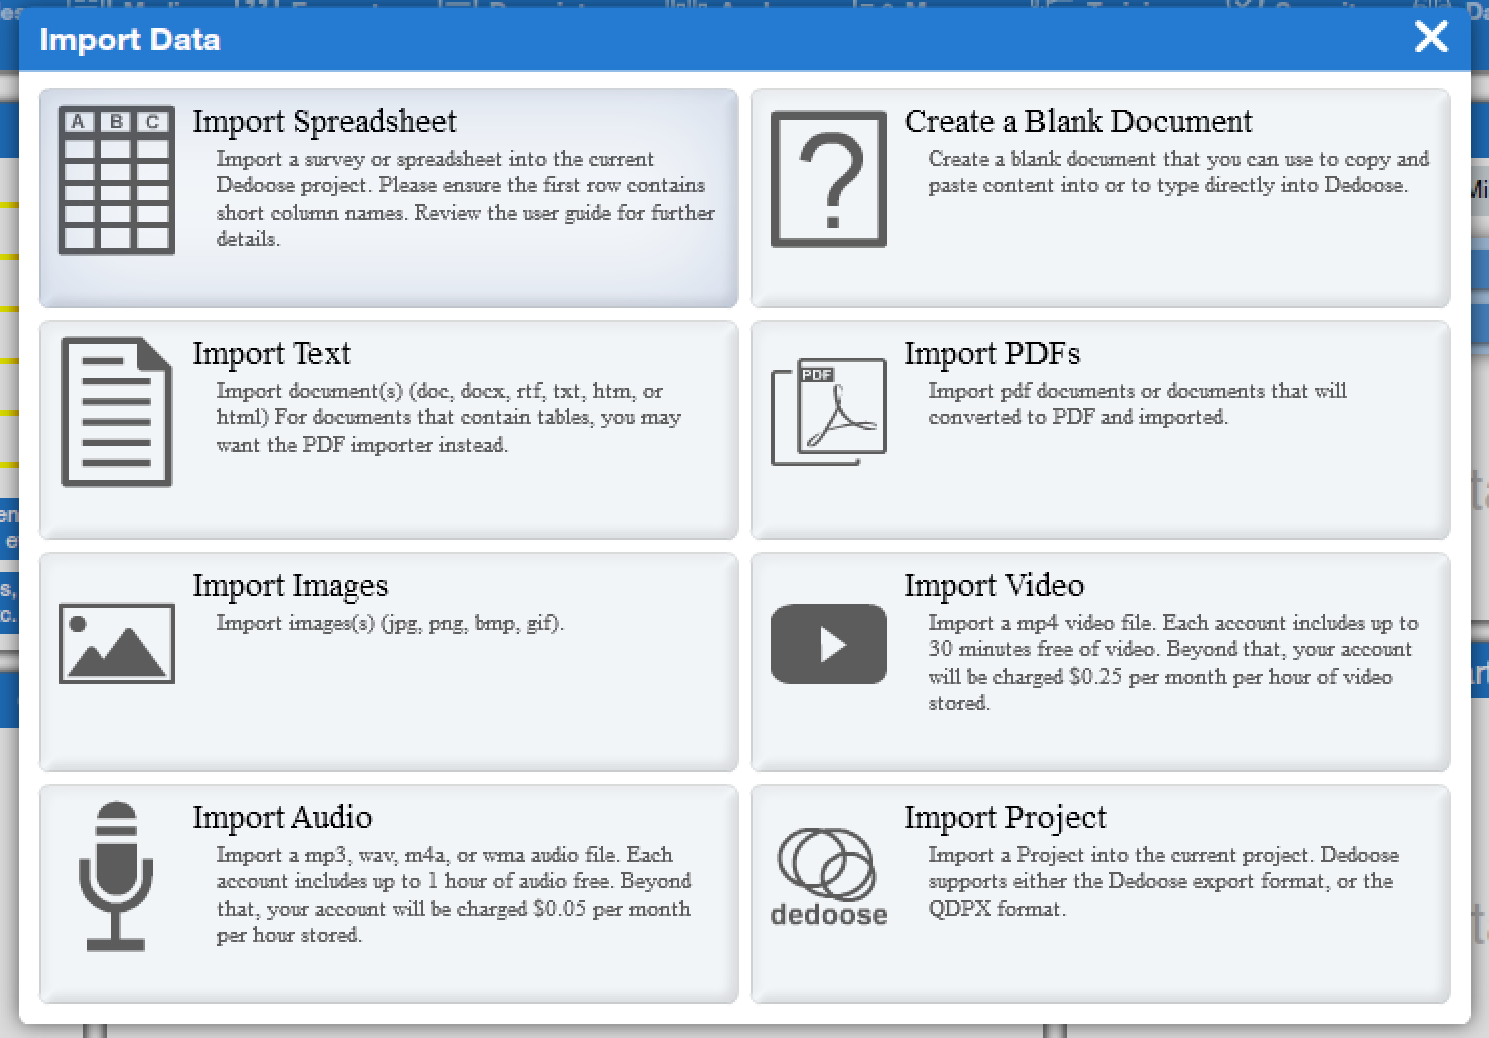
This will open a pop-up window with a variety of options for importing media, as shown in Figure 10, depending on how your data is stored. On the most basic level, you can create a blank document and type or copy-paste content into Dedoose, but that becomes cumbersome with more than a small volume of data. If you have stored fieldnotes in document (*.doc, *.docx, *.rtf, *.txt, *.htm, or *.html) or in PDF format, you can choose the “Import Text” or “Import PDFs” options, respectively. These options will allow you to select one or more files and have them all imported at once. Using this option is especially handy when you have a separate, single file for each interview, respondent, or case, as Dedoose will then store each file as a separate instance of data in ways that facilitate analysis. It is also possible to import image files (*.jpg, *.png, *.bmp, or *.gif), which is a helpful option for visual sociology. Dedoose can handle audio and video files but at additional cost, and discussing these features is beyond the scope of this text. Finally, you can import a spreadsheet. However, this method of importation requires careful spreadsheet construction and formatting. The Dedoose User Guide (scroll down to “Survey Importer”) provides the necessary details about how to format your file.
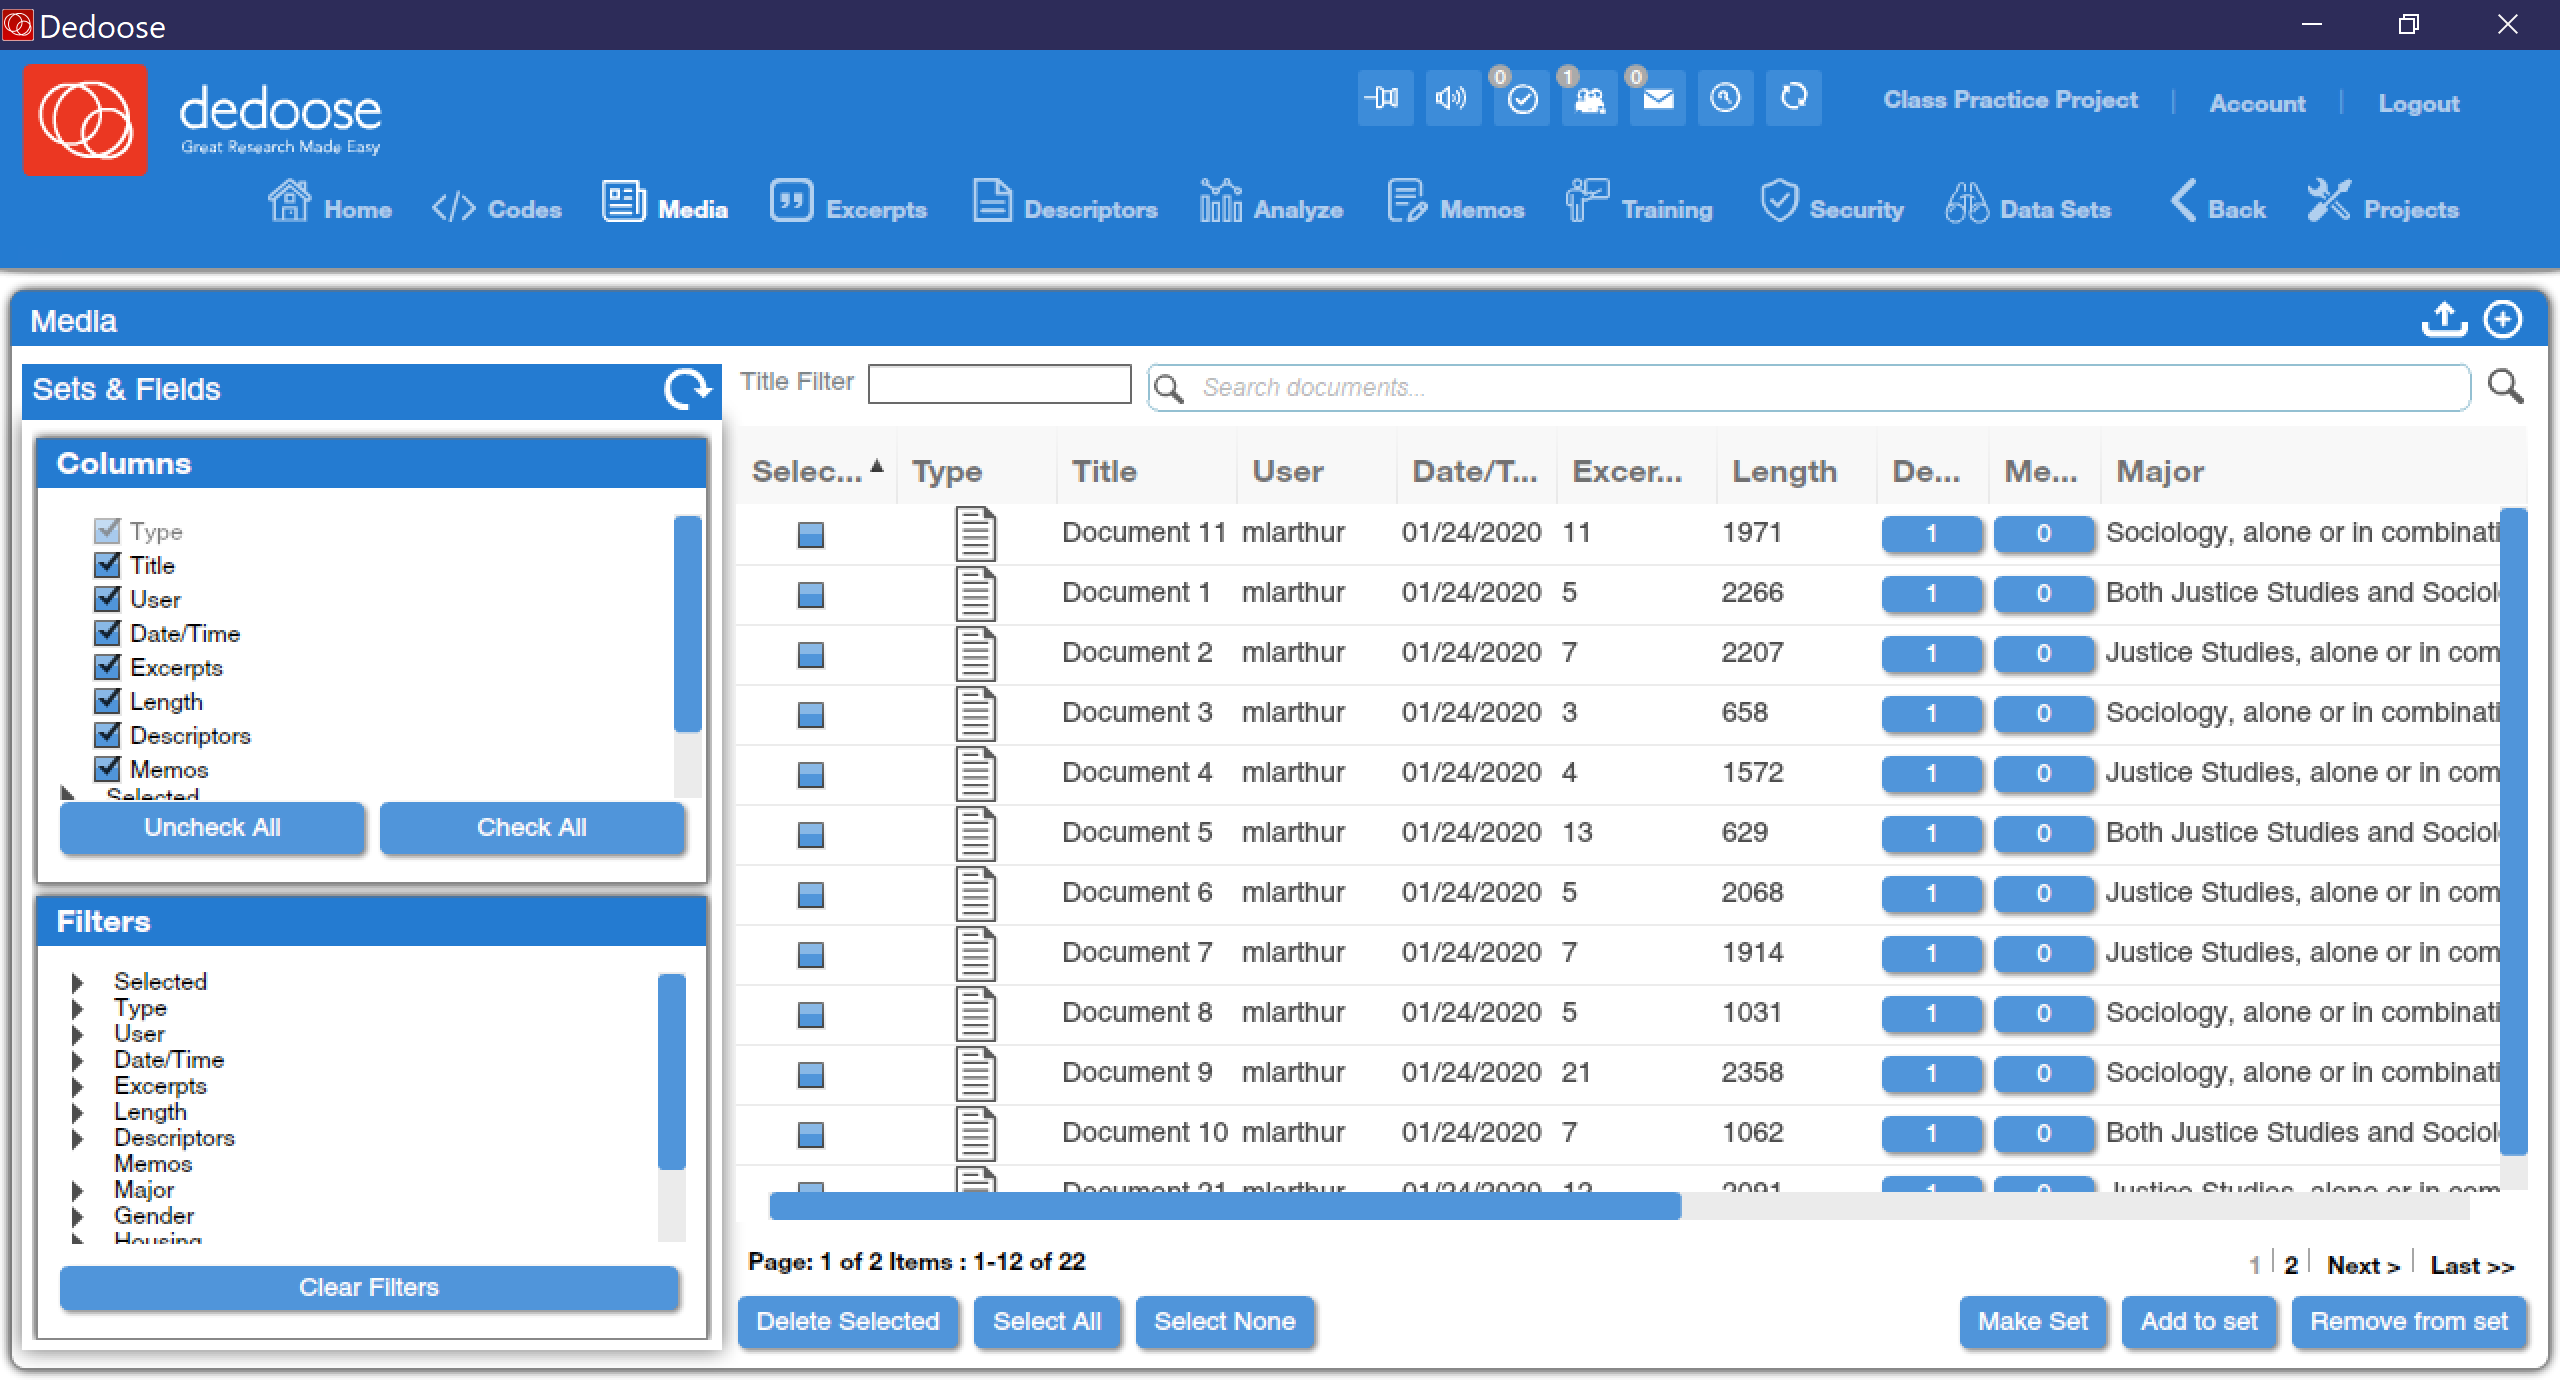
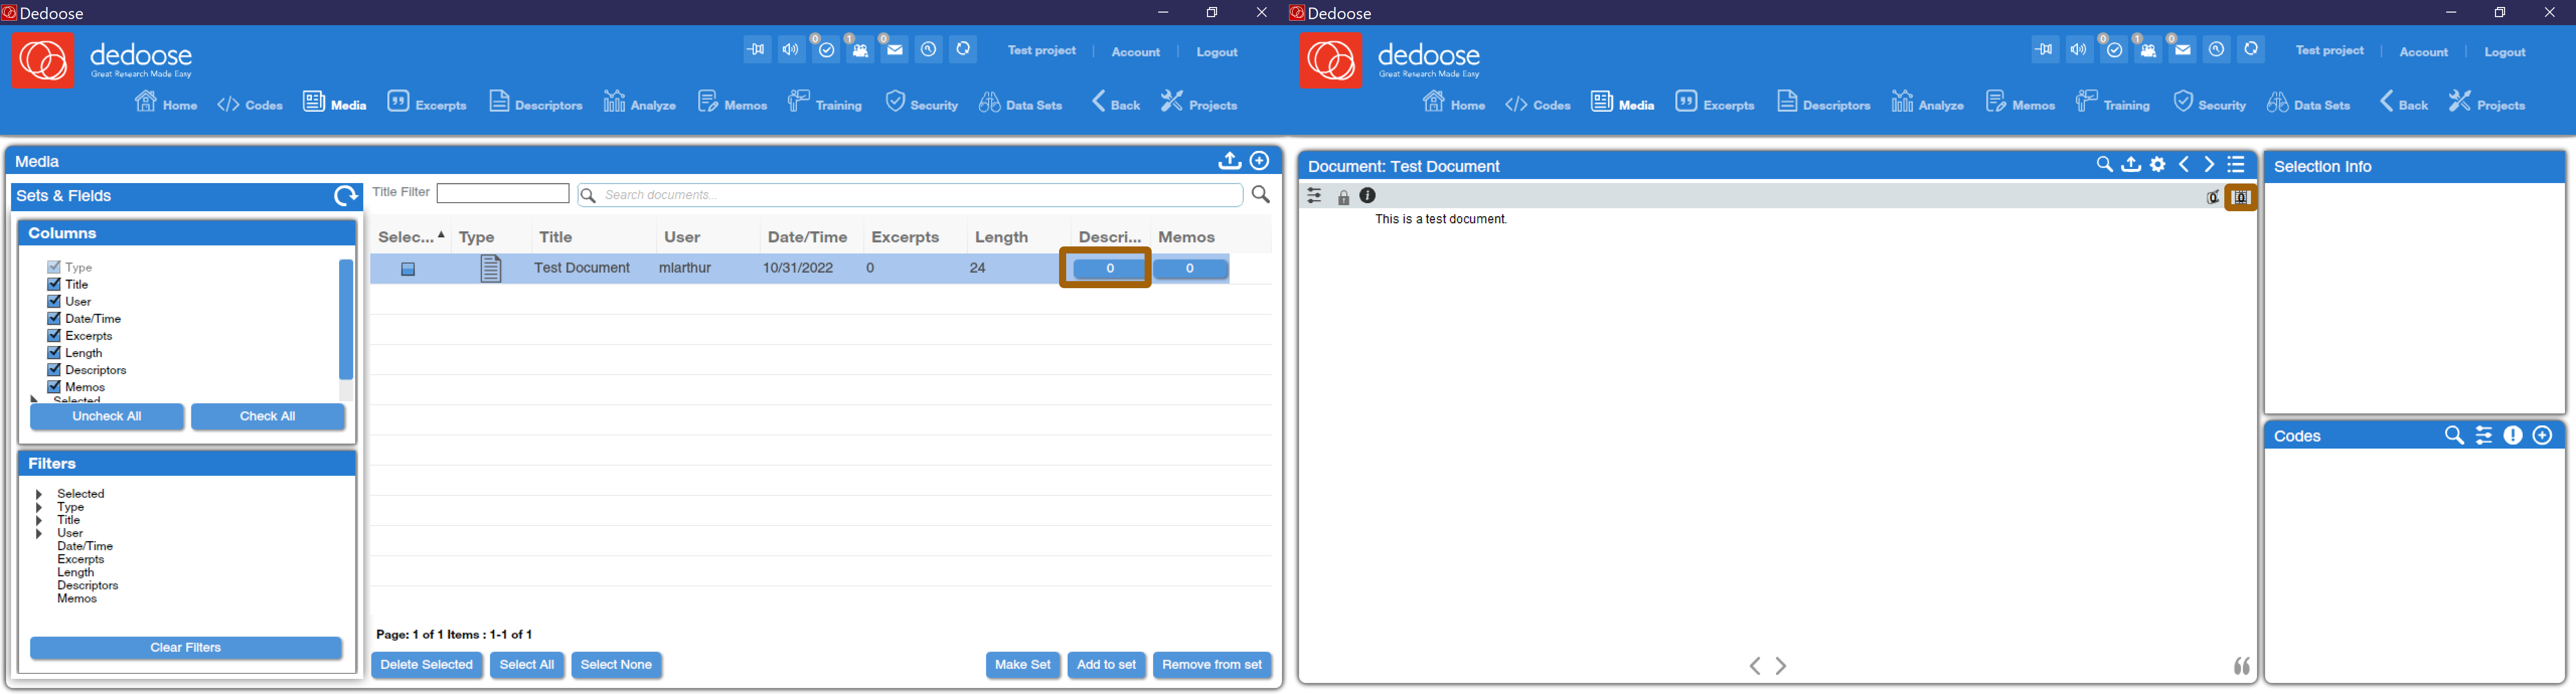
Once your data is imported, you can view and manipulate it using the Media tools by clicking on the Media icon at the top of the Dedoose screen. The media icon takes users to a window that displays a list of all documents, graphics, or other texts that are part of a project, with their title, the user that imported them, the date they were imported, their length, and several other features that will be discussed later on in this text (including descriptors, memos, and excerpts), as shown in Figure 12.
If you click on any media item, Dedoose opens that particular media item, as shown in Figure 13.
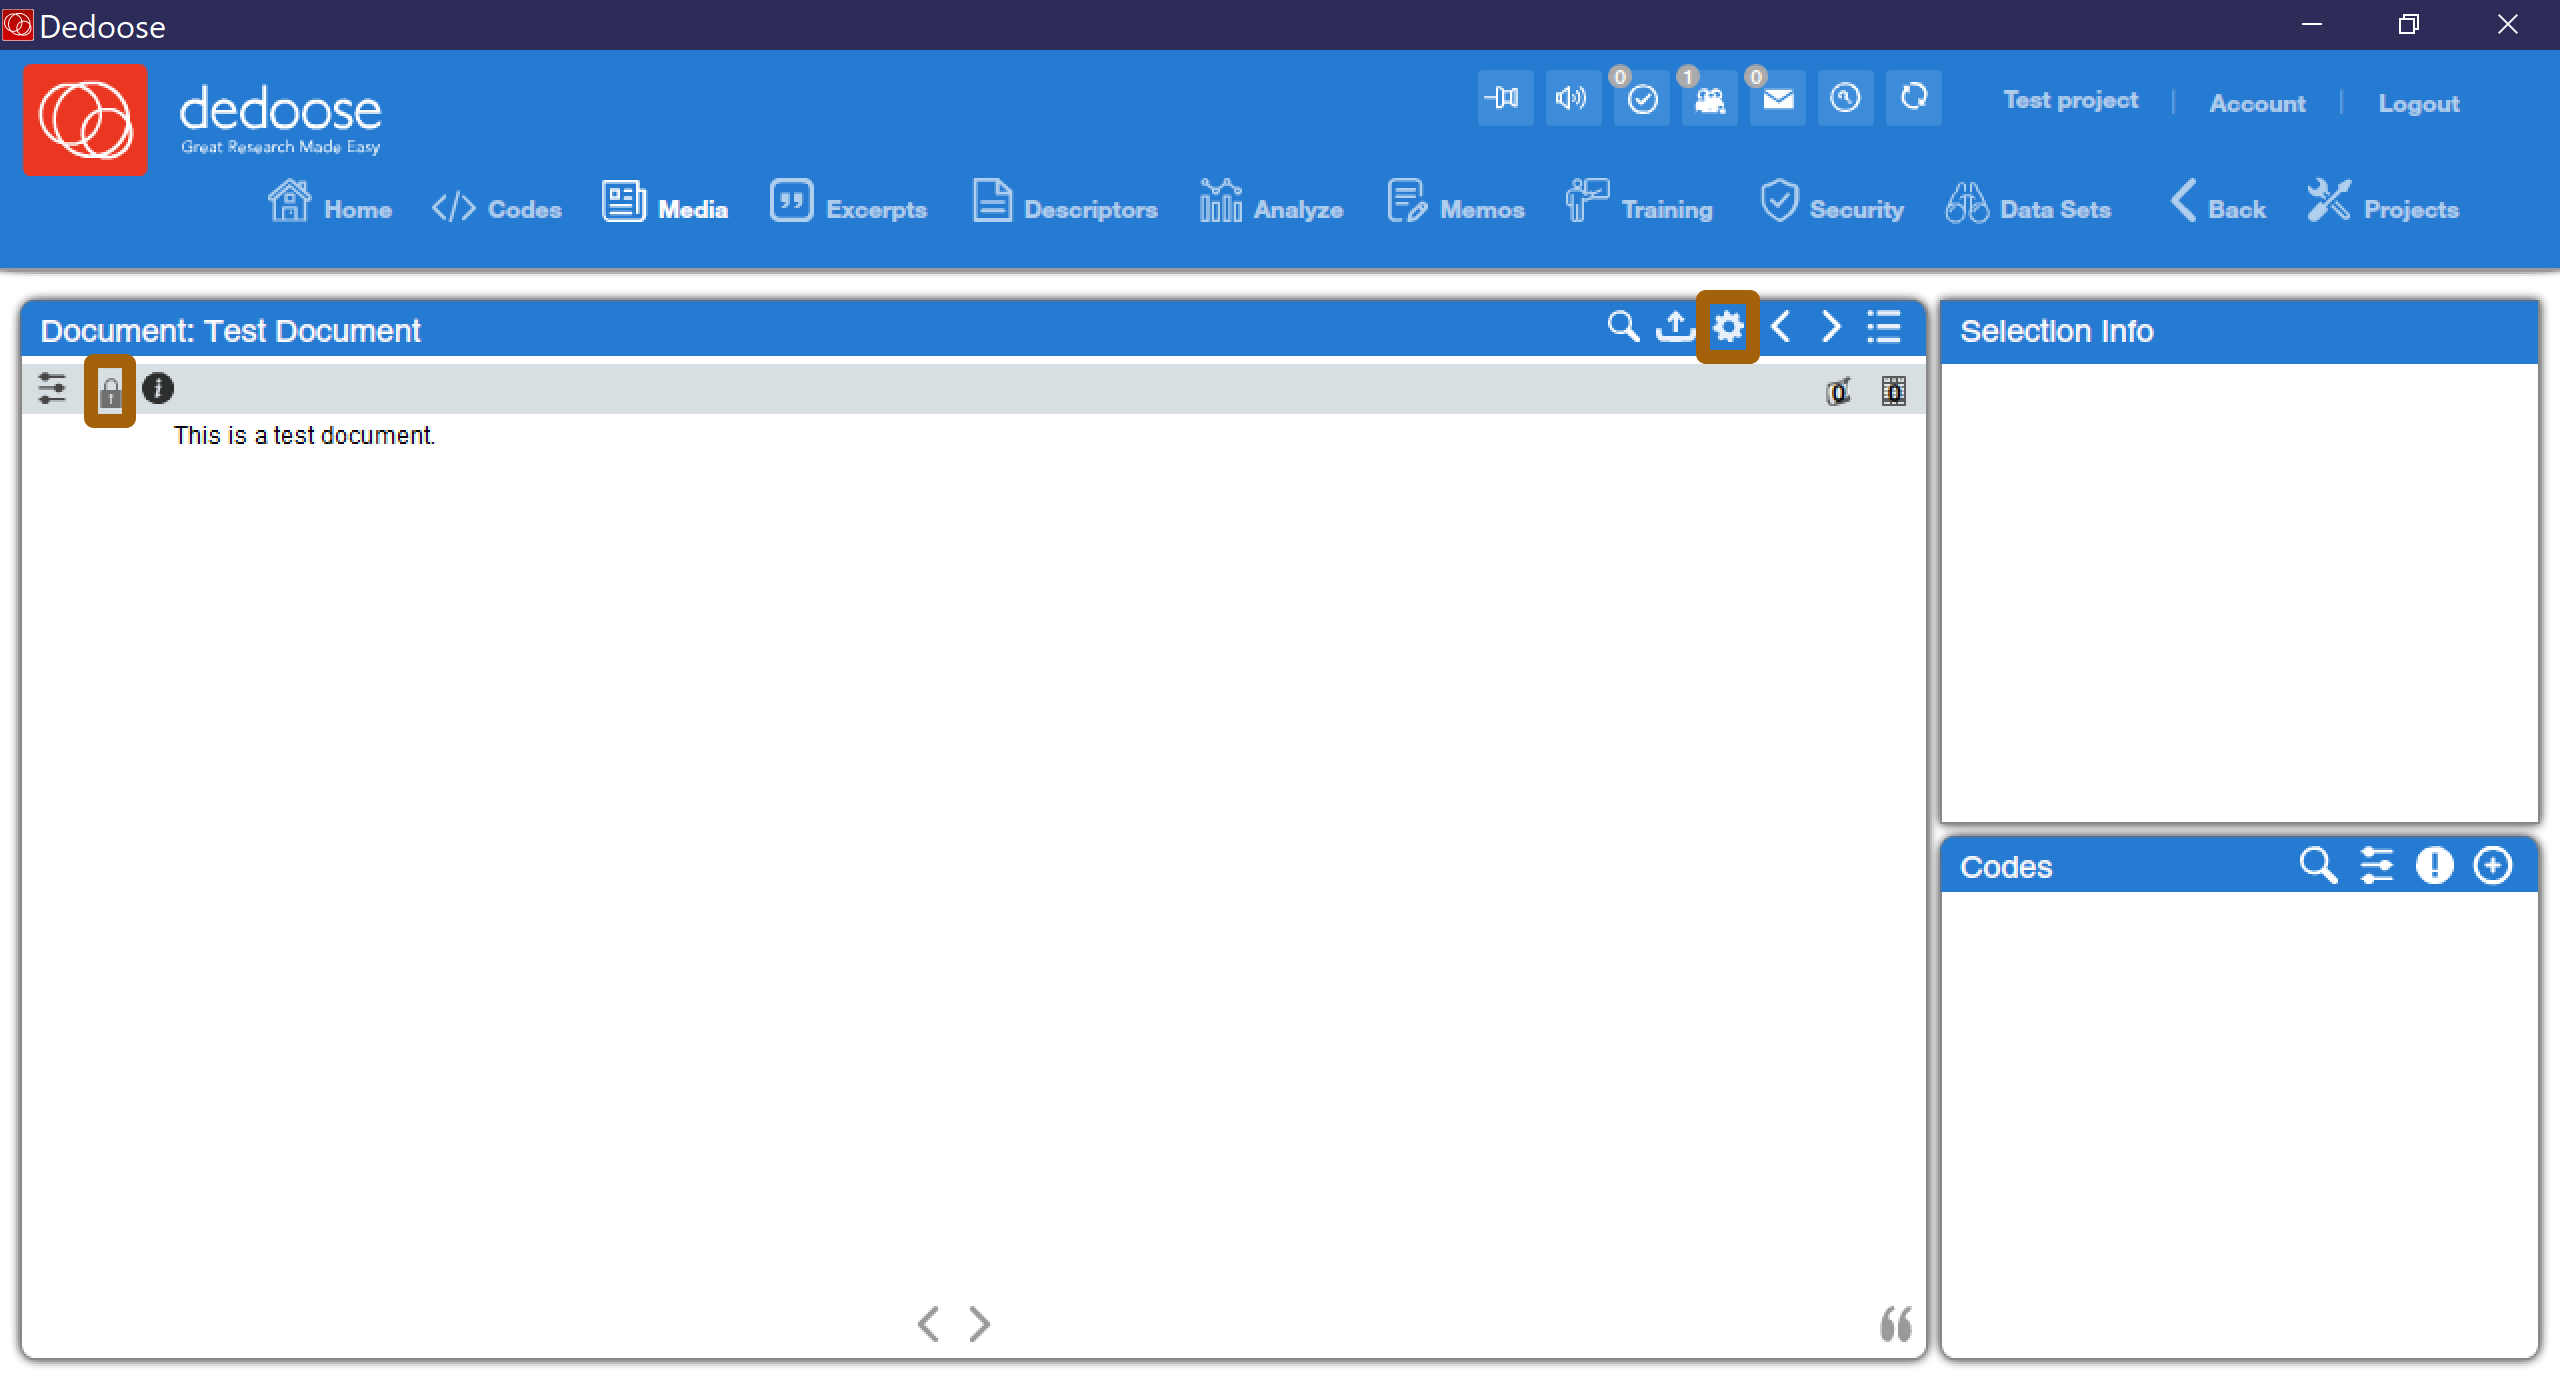
By clicking on the gearshift highlighted in Figure 13, you can edit the title or description of a media item. And by clicking on the lock icon highlighted in Figure 13, you can edit the text in the media item itself. Other features of the media window will be discussed later, after those tools are introduced.
There are two additional important features that are part of setting up your data in Dedoose. The first is called “Descriptors.” Descriptors are category labels that apply to an entire text or piece of media or to its author or creator—they are not codes, which are applied to specific segments of text. For instance, if we were keeping track of the gender, age, or race of the author of a narrative or the participant in an interview, that would be a descriptor. Similarly, if our study involved collecting advertisements, the magazine, website, or television program on which the advertisement appeared might be a descriptor. Descriptors are created and edited in Dedoose by using the Descriptors tool in the toolbar at the top of the program.
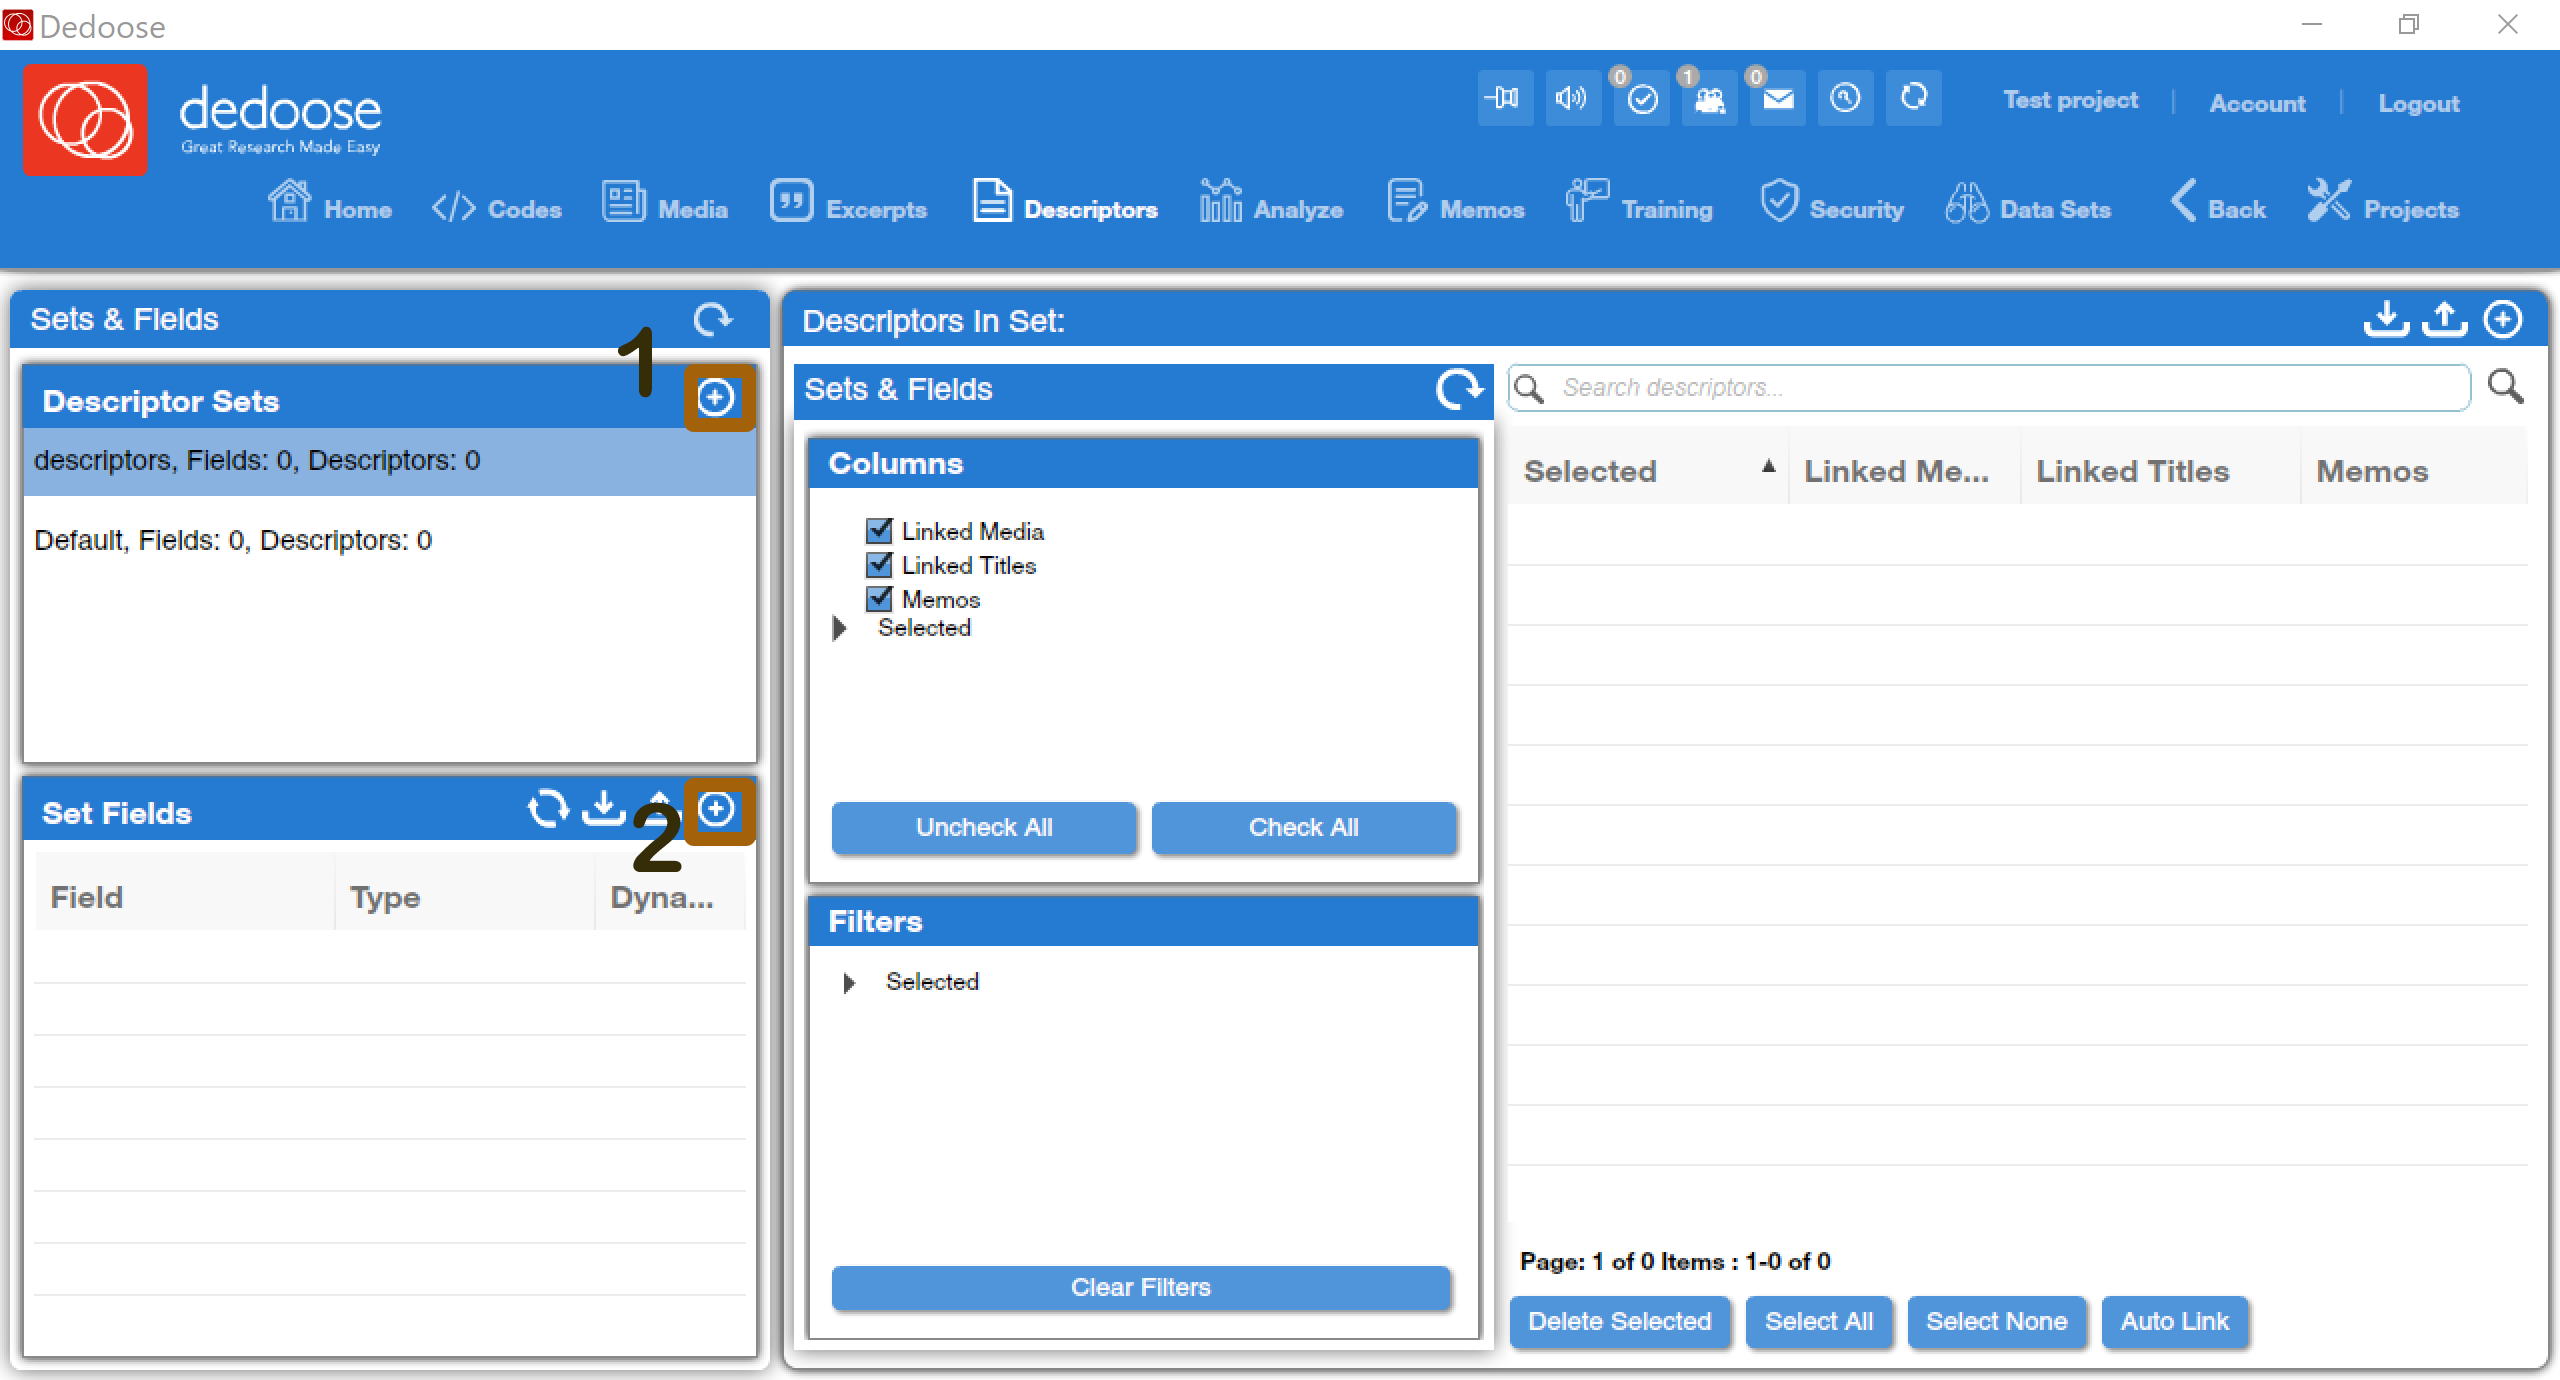
To create descriptors, load the descriptors tool using the icon shown in Figure 14, and then click on the plus sign in the circle highlighted in Figure 15 next to the number 1, in the Descriptor Sets section of the screen. Give your descriptor set a name (the name does not matter, it is just part of the data storage system) and click submit. Then, click on the plus sign in the circle highlighted in Figure 15 next to the number 2. This will bring up a window that permits you to develop a set of descriptors.
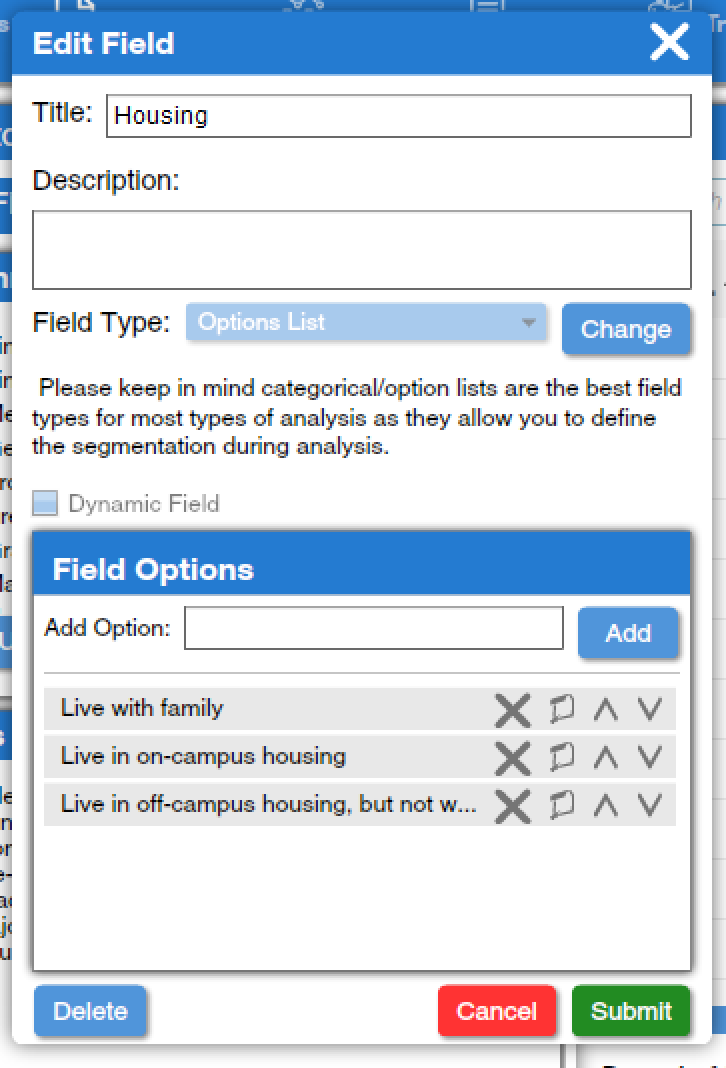
For each descriptor you wish to add, as shown in Figure 16, you can provide a name (something like “gender” or “age” or “magazine appeared in”) and a longer description explaining the descriptor so you can remember what you did. Then you can choose a field type from four options: an option list, which is basically the same as a multiple-choice question; a number, which permits the free entry of any numerical value; a date; or a text field, in which any short text can be entered. There is an option for dynamic fields, which are those where data might change over time, as in a longitudinal study, but we will leave those aside for the purposes of this discussion. If you select option list for field type, you can then use “Add Options” under Field Options to add each of your multiple-choice options to the list. When you are done, click submit. For example, Figure 16 shows an option list descriptor called “Housing,” used in a study of student life, in which respondents indicated whether they lived with their family, lived in on-campus housing, or lived off-campus but not with their family. You can use the X icon to delete an option from the list, the icon that looks like a piece of paper to edit the option, and the ∧ and ∨ icons to reorder your options.
The next step in using descriptors is to link your descriptors to your media. There are several ways to do this. You can go to the Media window and click the blue box under the Descriptors heading, or you can use the tiny (and hard to see) descriptor icon on an individual media item. Both options are shown in Figure 17.
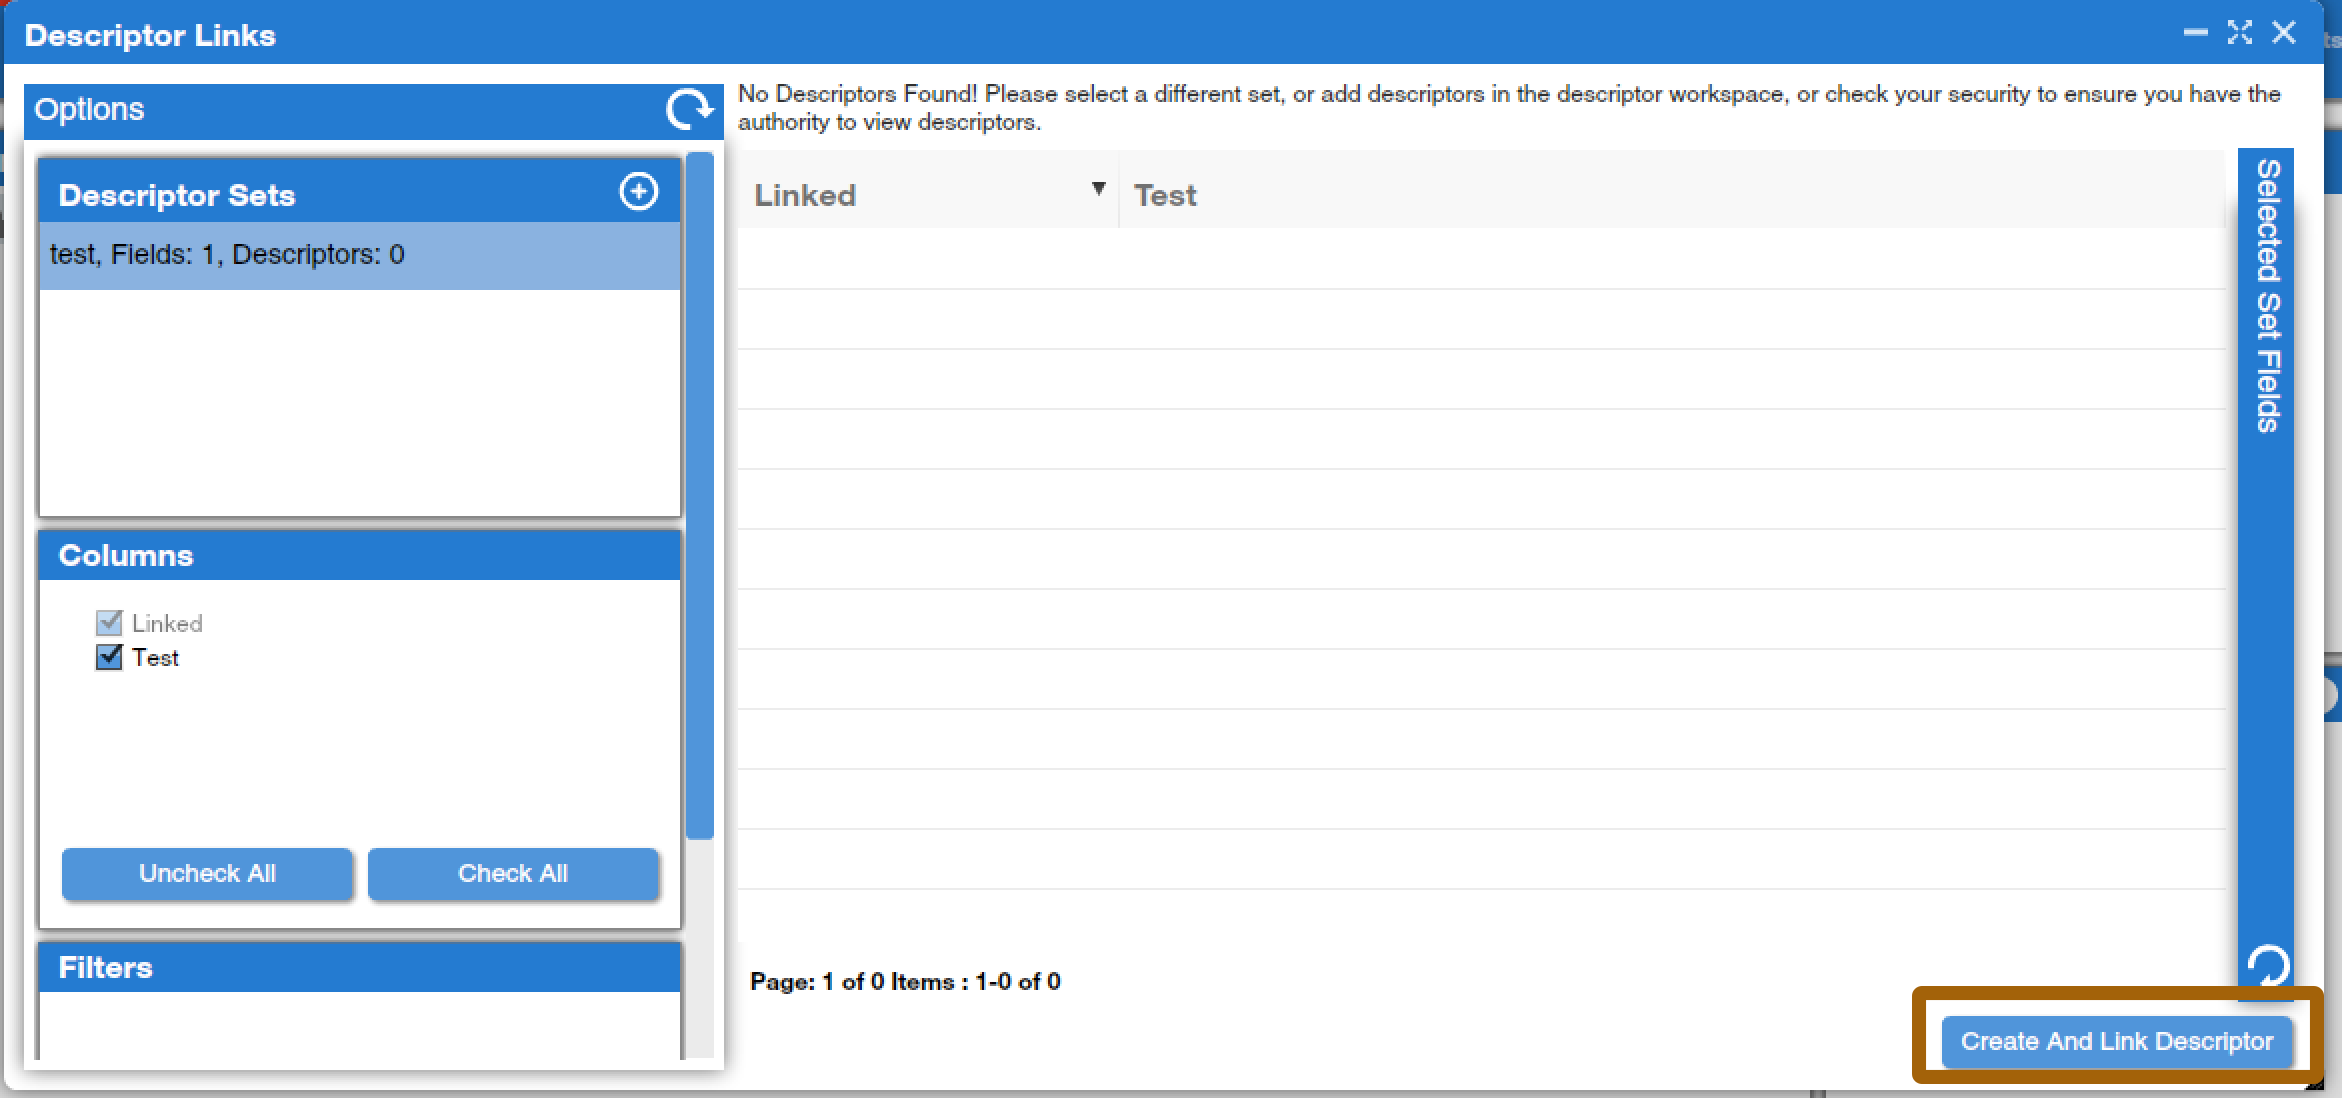
Clicking on either option will bring up a popup window called Descriptor Links. Then click “Create and Link Descriptor,” as shown in Figure 18.
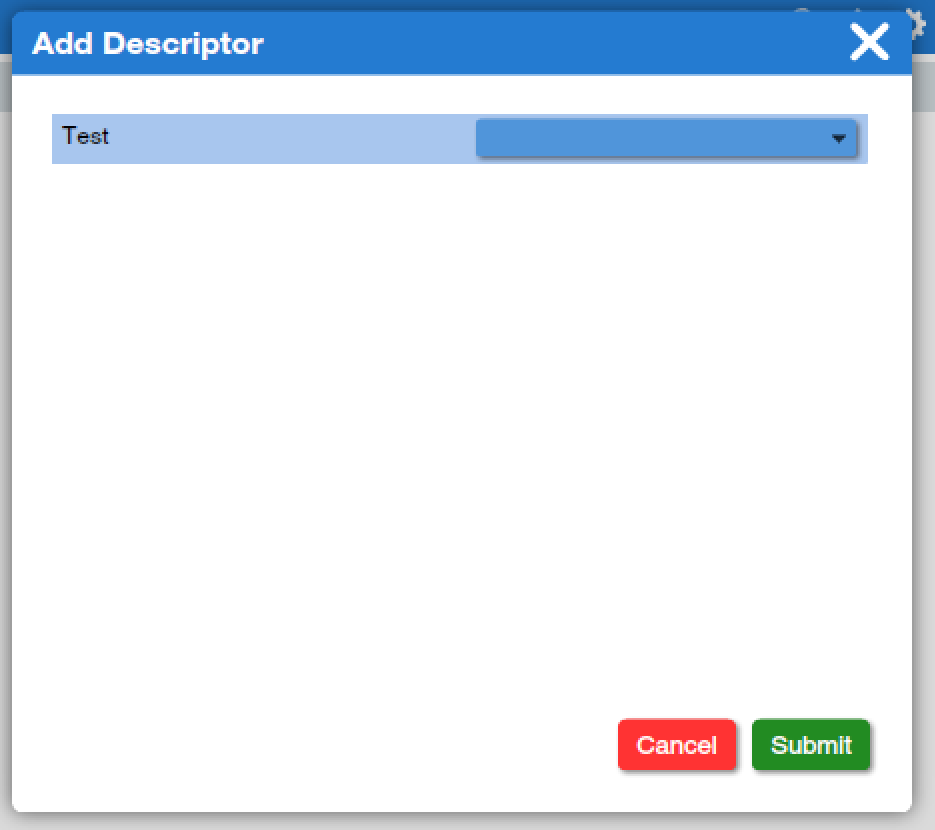
This will bring up a pop-up window in which you can select from drop-down menus (for option lists) or enter (for other types of descriptor fields) as shown in Figure 19 to apply descriptors to the selected media item. You may have far more descriptors than are shown here; however many there are, select the appropriate options for each one, and then click submit.
You will need to do this individually for each media item in your project. Once you have done this, if you return to the Media tool, you will be able to preview all of your media items and their linked descriptors. In addition, if you return to the Descriptors tool, you will see all of your descriptors, but without the associated media.
The final tool you should know about as you get started with Dedoose is the memo tool. To create a memo, first open a specific media item, then click on the memo icon, as shown in Figure 20.

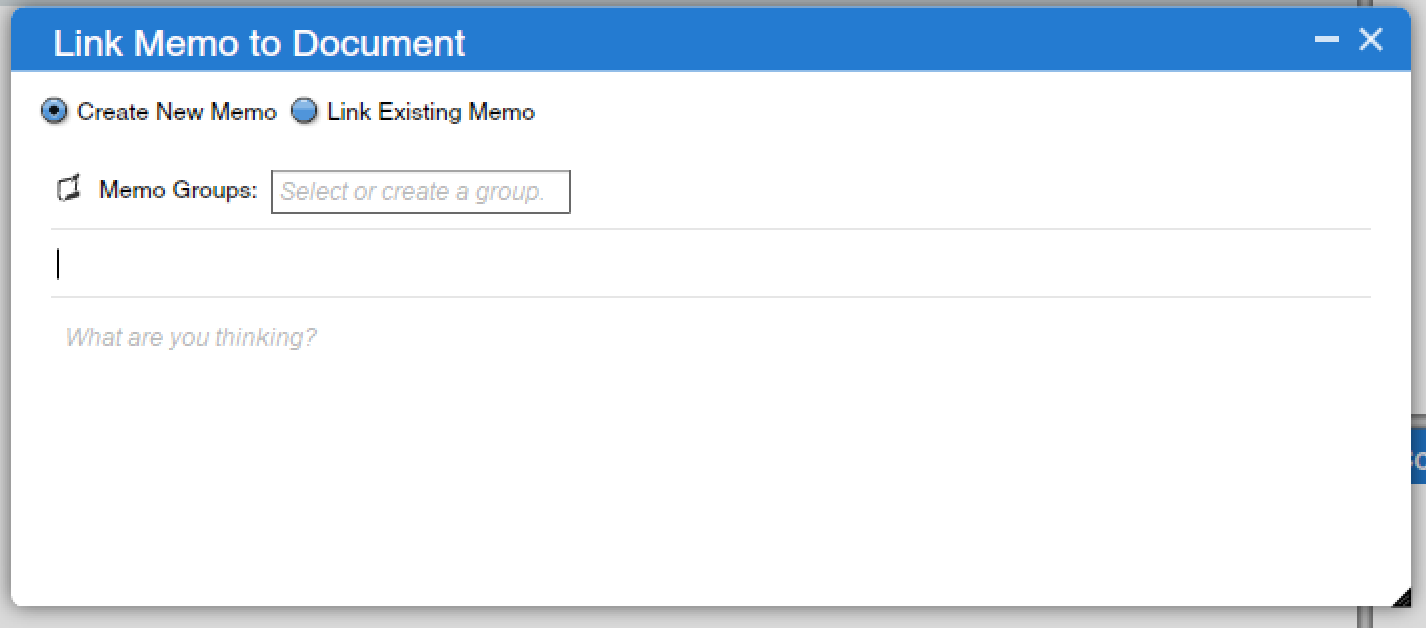
This will open a pop-up window, as shown in Figure 21, in which you can create a memo. You should enter a title, and then you can type or copy-paste your text where the screen says “What are you thinking?” Using the memo groups box at the top, you can also create a memo group or add a memo to an existing group, if you have many memos and want to classify or categorize them. Once you begin typing, a “Save” button will appear at the bottom of the memo screen—be sure to save when you are done.
Once you have created one or more memos, you can use the memos icon, as shown in Figure 22, to load a window that shows all of your memos and allows you to work with them.
Backing Up Your Data & Managing Dedoose
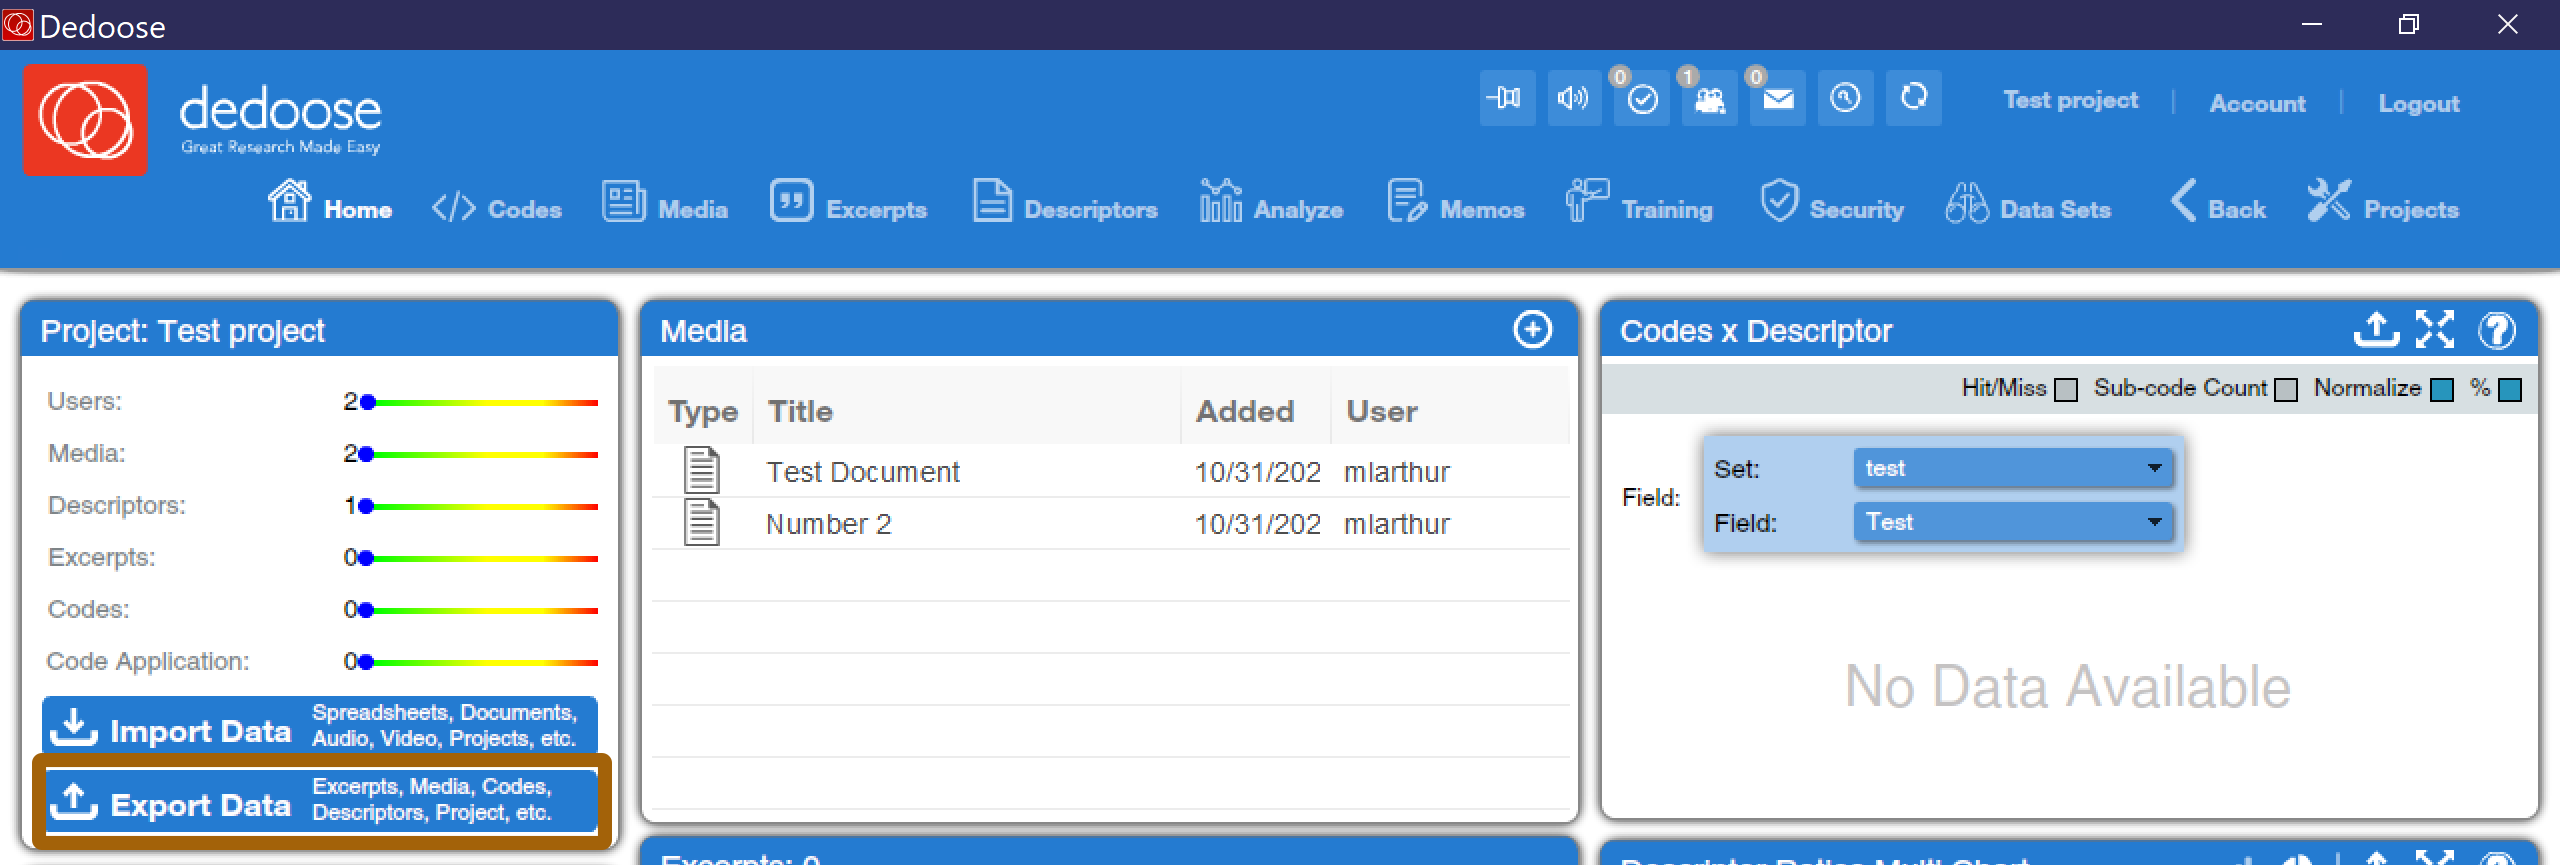
As Dedoose uses cloud-based storage to keep your data, you do not need to save—all data is automatically saved. However, you may wish to download your data, either to back it up, to keep a local copy, or to import it into a different software package in the future. You can use the Export button on the Home screen, as shown in Figure 23, to export all or a portion of a project.
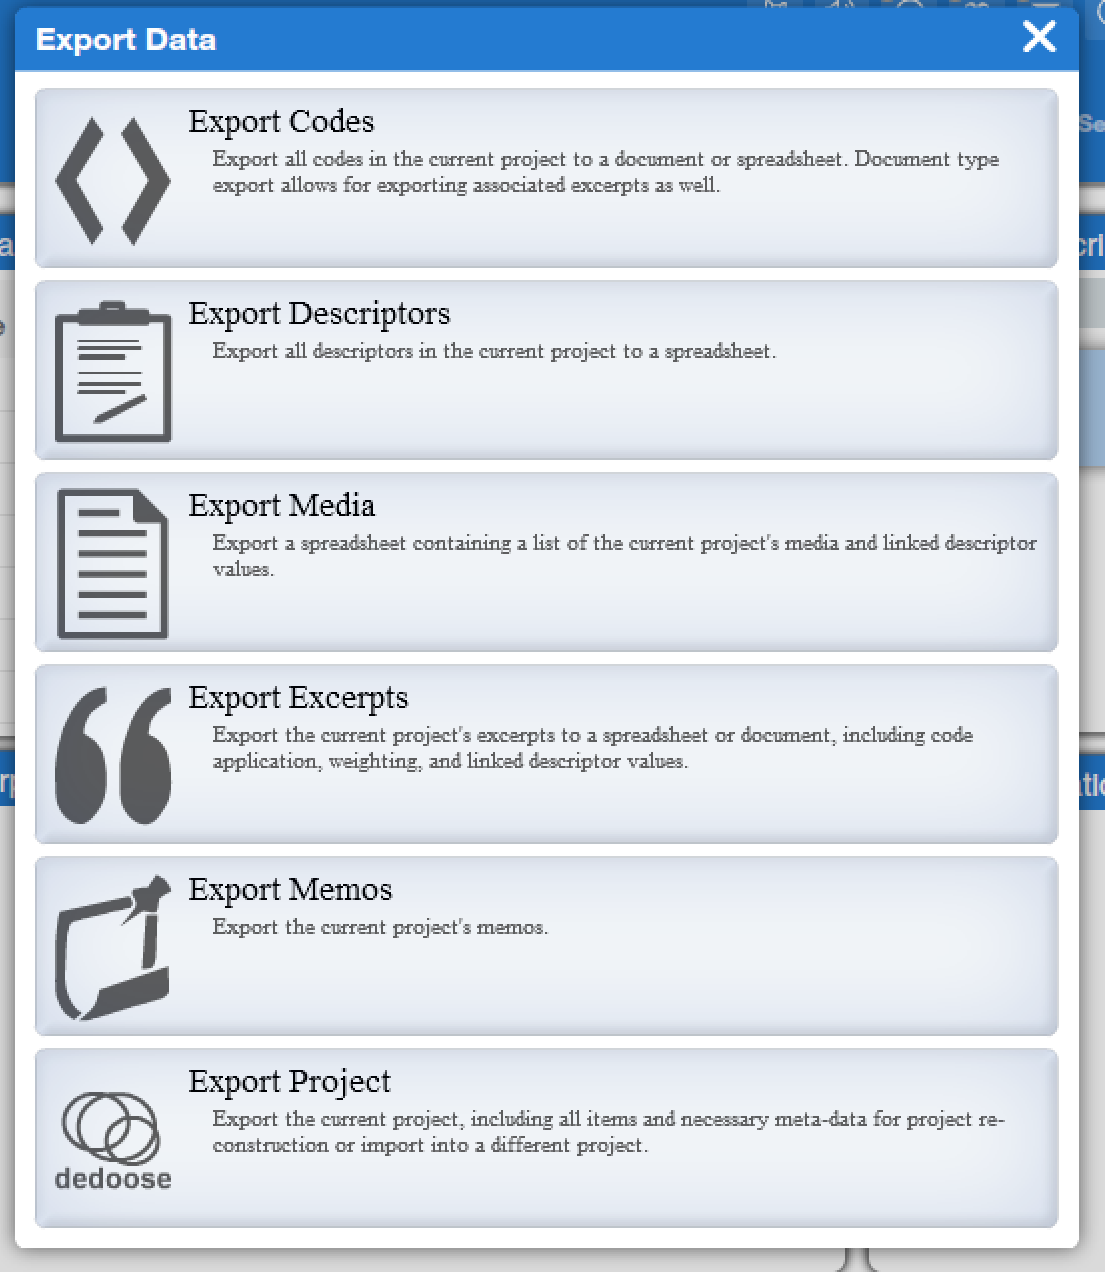
The export button brings up a pop-up window, as shown in Figure 24, with a variety of options. You can export just the codes, descriptors, media information with linked descriptors, or excerpts to a spreadsheet by selecting the option of your choice. Excerpts, as well as memos, can be exported to a document. Keep in mind that none of these options involves exporting the full volume of original media—Dedoose strongly encourages you to keep your original media, in the form it was prior to uploading to Dedoose, intact and backed up outside of Dedoose. If you have the media plus these exports, you can load data into other programs or applications. There is also an option to export the entire project, but this type of file is hard to use outside of Dedoose itself, so it best serves as a backup of your work.
If Dedoose gets a little slow or nonresponsive, you may wish to log out of the application, close it, and then reopen and log back in. There is also a refresh icon (🗘)[1] at the top of the screen that can be helpful if you are working on a project with another researcher and want to be sure their changes have loaded into your view.
Exercises
- Create a project in Dedoose. If you are doing this work as part of a class, give your instructor access to the project.
- Download five oral histories from the COVID-19 Archive (you can do this at https://covid-19archive.org/s/oralhistory/item). Import them into your project.
- Create a descriptor set with at least three descriptors you find relevant to the oral histories you selected. Link the descriptor set to your oral history media, being sure to correctly select any options.
- Read one of the oral histories you downloaded. Write a memo of at least 250 words summarizing the most important insights in that oral history, and add your memo to that media item in Dedoose.
Media Attributions
- Dedoose Home Screen with Projects Button © Dedoose is licensed under a All Rights Reserved license
- Creating a New Project © Dedoose is licensed under a All Rights Reserved license
- Creating a Project Popup Window © Dedoose is licensed under a All Rights Reserved license
- Loading a Project © Dedoose is licensed under a All Rights Reserved license
- The Security Icon © Dedoose is licensed under a All Rights Reserved license
- The Security Center © Dedoose is licensed under a All Rights Reserved license
- Security Privileges Popup © Dedoose is licensed under a All Rights Reserved license
- Adding User to Project © Dedoose is licensed under a All Rights Reserved license
- Adding Media © Dedoose is licensed under a All Rights Reserved license
- Importing Data Popup Window © Dedoose is licensed under a All Rights Reserved license
- The Media Icon © Dedoose is licensed under a All Rights Reserved license
- The Dedoose Media Tool © Dedoose is licensed under a All Rights Reserved license
- Editing Media © Dedoose is licensed under a All Rights Reserved license
- The Descriptors Icon © Dedoose is licensed under a All Rights Reserved license
- The Descriptors Window © Dedoose is licensed under a All Rights Reserved license
- Editing Descriptor Fields © Dedoose is licensed under a All Rights Reserved license
- Adding Descriptors to Media © Dedoose is licensed under a All Rights Reserved license
- Descriptor Links © Dedoose is licensed under a All Rights Reserved license
- Editing Descriptors © Dedoose
- Opening the Memo Tool © Dedoose is licensed under a All Rights Reserved license
- Adding a Memo © Dedoose is licensed under a All Rights Reserved license
- The Memo Icon © Dedoose is licensed under a All Rights Reserved license
- The Export Button © Dedoose is licensed under a All Rights Reserved license
- Export Options Window © Dedoose is licensed under a All Rights Reserved license
A category in an information storage system; more specifically in Dedoose, a characteristic of an author or entire text. Also, the word used to indicate that category or characteristic.
